Although our recent crochet along journey is at an end I really wanted to do a post showcasing some of the wonderful Filet Fantastic blankets that YOU have made! It’s been such a privilege to have had the opportunity to watch your blankets grow every week – it has been really special to see.
Don’t if you are new to the blog and this is the first you are hearing about this CAL; you can find a list with all the links about the CAL here and I promise to keep all the details on the blog FOREVER.
This pattern will be free here on the blog but it will also be available in an e-book on Ravelry. Now that the CAL is over the full e-booklet with all the pattern details has been uploaded to Ravelry (and will be added to my other pattern stores if you don’t use Ravelry). This booklet is available in either UK or US terms and contains the full pattern descriptions, charts and information all in one place.
It’s amazing how many countries this blanket has been made in including; UK, US, Australia, Netherlands, New Zealand, Germany, Canada, Sweden, Czech Republic, Italy, France and Ireland!
There have been many beautiful blankets put together with the exclusive kits from Black Sheep Wools , there were two rainbow colourway options, one in Scheepjes Colour Crafter (DK) and another in Scheepjes Riverwashed (4ply) – both are yarns which I’ve personally used many times and love.
Doesn’t that collection of beautiful happy rainbow blankets just make your heart sing! They are all just so pretty!
If you were looking to purchase a kit from Black Sheep Wools although the kits are showing out of stock at the moment, Black Sheep are in the process of getting the yarn together to restock (it’s just been held up a little by the new Brexit procedures). If you click on the button ‘notify me when available’ on their website, then you will get an email when the kits are available to order again.
There are also some stash buster, own colourways or single colour blankets photos that have been shared. I’d love to share all the blankets that have been made, as they are all so fantastic – but that would be an extremely lost post, so I have just selected a few different ones for inspiration purposes.
Aren’t they just all stunning! Thanks again to everyone that joined in the CAL with me this year and that shared their beautiful work with me! I have really loved seeing your finished blankets 💕
Although the our current CAL is now over please keep sharing your photos on Ravelry, in the Facebook group and Instagram – they are such a wonderful source of inspiration for us all.
I need at this point to say some quick thank you’s! There’s actually more people than me that helped to make this CAL happen! Many thanks to Scheepjes for supplying the yarn support for the Colour Crafter blanket so I could offer an alternative option of yarn for you. I need to thank Sara and Lucy from Black Sheep Wools for their time in putting together the kits, big thanks to Mrs G Makes and Simply Shade Cards for their stitch marker and shade card contributions.
I also need to say a MAHOOSIVE thank you to all the testers that helped with the colossal task of turning my scribbles into something legible and who helped with the moderation of the Facebook Group during CAL. So big shout outs to Kimberlie, Steff, Kim, Tracey L, Tracey P, Amanda, Leanne, Paula, Dulcy, Jan, Jacki and Leanne – this wouldn’t have been possible without your help!
Thanks as always to my family for bearing with me while I worked on the CAL; especially my husband for driving round to find that perfect spot for a photo, and to my wonderful mum who crocheted up the second colour crafter version of the blanket 💕
Now it’s time for me to fold up my Filet Fantastic Blanket!
But our community crafting endeavours are not yet over for this year, we’ve got our summer make-along starting on 5 July (read more about Whispers of the Sea here).
You might also wish to mark on your calendar a BRAND NEW four part FREE mini make along, sponsored by Anchor Yarns, starting on 1 August – though I’ll tell you more about that later, though you could always sign up to the KCACOUK newsletter to be kept up to date with any new plans.
And of course there is always 2022…you’ll be pleased to hear that planning for the next big CAL is already underway!
I hope you will continue to join me with these projects, it’s so wonderful to watch my designs grow with you!
Until next time thank you for hooking along with me!
Keep calm and crochet on my friends xx
Please note that some of the links in my blog are affiliate links. I may earn a small commission if you purchase via these links, but the price you pay is not affected.
Wow! I can’t even say how it feels to be sharing with you the last part of the Filet Fantastic Crochet Along today! Over the last 12 weeks – we have worked together to build some AMAZING blankets together, and I hope you have enjoyed the CAL as much as I enjoyed designing it for you. Below you will find the very last 4 rounds of our blanket *sniff sniff*.
As you maybe aware unfortunately there were a few errors discovered in Part 11 – these have been amended here on the blog and on Ravelry. In addition I’ve also added an extra chart as an example for the corner of Part 11 as somebody mentioned that would be useful.
Thank you for everyone who has been sharing their photos, I love to see how your blankets are developing. Below you can see just a few of the finished part 11’s. Not as many to share yet this week as I know Part 11 was the biggest part of the whole CAL, and it might take some people a little bit longer to finish up their blankets. The photos below have been taken from Ravelry, in the Facebook group and Instagram.
If you want to link your photos the hashtag for this years CAL is #KCACOUKCAL21 for Twitter and Instagram. Though you you can also join in with any progress photos by linking your projects on your favourite social media sites: Ravelry, my Facebook page or Facebook group and Pinterest.
If you are brand new to the CAL there’s is still plenty of time to join in with us. You can find all the information you need on the CAL landing page, where I’ll link all the CAL posts in one place as I add them here to the blog. Yarn packs are still available from the lovely folks at Black Sheep Wools and there are a number of CAL accessories that are also available from some fabulous small businesses (that I talked a little more about here).
During the duration of the CAL this pattern will be released part by part here on the blog and also via Ravelry updates in the form of a printer friendly PDF ebooklet that is available for purchase. Please note you will only have to purchase the pattern once, updates will be automatically added so your pattern is updated each week and at the end of the 12 weeks you will have the full pattern to keep. As with any purchase you make of my patterns your support of me and my crochet endeavours is very much appreciated – thank you for supporting my work!
If you are new to filet crochet you might find my blog post about ‘Top Tips for Filet Crochet’ useful on how to read filet crochet charts with some specific tips on the technique.
Filet Fantastic: Part 12 – The Border
335g / 871m or 4 balls of of Scheepjes River Washed Steenbras (Shade 942) or 2 balls of Scheepjes Colour Crafter in Meppel (1061).
Gauge: 5tr = 2.5cm (1inch). Gauge is not critical for this design, with each part I will provide the size of my work. If your gauge does not meet mine it will just mean you will end up with a bigger or smaller blanket. If you wish to match my gauge you might try going up a hook size if your tension is quite tight, or going down a hook size if your tension is looser.
The pattern below is in UK Terms, scroll down for US Terms:
STITCH GUIDANCE
Slip Stitch (sl st): Insert hook in st indicated, yarn over and draw through all loops.
Double Crochet (dc): Insert hook in st indicated and pull up a loop (two loops on hook), yarn over, pull through both loops on hook.
Treble (tr): Yarn over, insert hook in indicated st and pull up a loop (three loops on hook), yarn over, pull through two loops, yarn over, pull through remaining two loops on hook.
Back Post Treble (BPtr): Yarn over, insert hook from back to front to back around post of indicated stitch below (your hook should now be positioned horizontally behind the st that you’re working around), yarn over and pull up a loop, yarn over pull through two loops on hook (two loops on hook), yarn over, pull through remaining loops on hook.
Treble 5 together (tr5tog): The Treble Crochet 5 Together is a technique uses a series of trebles into one stitch to create a cluster. To tr5tog, work 5tr all into the same stitch, leaving the last loop unworked on the hook each time. When you’ve got 6 loops on the hook, yarn over and pull through all six sts.
Picot Stitch: Picots are created by chaining the number of stitches called for in the pattern and then working a slip stitch in the indicated stitch or space. E.g. ch 3, insert hook back into the centre of the base st, yo, pull through all loops on hook.
PATTERN – PART 12
Part 12 is worked in the round onto the right side of the CAL;
IMPORTANT PATTERN NOTE:
For the border pattern we will add 1 extra st to a corner so there will be (3tr, ch2, 2tr) on rnd 3.
Rnd 1: Attach yarn with a sl st to the first st to any corner, Ch3 (Counts as first tr here and throughout, then work 1BPtr in each st and (2tr, ch2, 2tr) in ch2-sp until you reach the corner with your starting ch3, (2tr, ch2, 1tr), sl st to the top of the beginning ch3 to join. (1200trs + 4 x 2ch-sps / 300trs each side)
Rnd 2: Ch3, 1tr in each st around with [2tr,ch2, 2tr] in each corner ch2-sp, until last corner, 1tr in the last st, sl st to the top of the beginning ch3 to join (1216trs + 4 x ch2-sps / 304trs each side)
Rnd 3: Sl st to the next st, ch3, 1tr in the next 2sts, * ch1, miss next st, 1tr in the next st, ch1, miss next st, 1tr in the next 3sts * repeat from * to * around until the corner with 1tr in the next st [3tr,ch3, 2tr] in each corner ch2-sp, until last corner, 1tr in the next st, ch1, miss next st,1tr in the next st, ch1, miss next st, sl st to the top of the beginning ch3 to join. (828trs + 408 x ch1-sps, 4 x ch3-sps / 207trs each side, 102 x ch1-sps, 1 x ch3-sp per side)
Rnd 4: Sl st to the next st, ch2 (start of tr5tog) complete tr5tog in same st, * ch3, sl st to the top of the tr5tog (picot made), ch3, 1dc in the top of the single tr of rnd 3, ch3, miss (ch-sp and 1tr), tr5tog in next st * repeat from * to * around with [ch5, tr5tog, ch3, sl st to top of tr5tog, ch5] in each corner ch2-sp until last corner is completed, 1dc in the top of the single tr of rnd 3, ch3, miss (ch-sp and 1tr), sl st to the top of the beginning tr5tog to join. Fasten off and weave in all ends. (204 x tr5tog including corners, 400 x ch3-sps. 204 picots and 4 x ch5-sps / 51 x tr5tog, 100 x ch3-sps, 50 picots (not including the corners) and 1 x ch5-sps per side).
Chart for sections of Part 12 below *
Pattern in US Terms:
BASIC FILET STITCHES
STITCH GUIDANCE
Slip Stitch (sl st): Insert hook in st indicated, yarn over and draw through all loops.
Single Crochet (sc): Insert hook in st indicated and pull up a loop (two loops on hook), yarn over, pull through both loops on hook.
Double Crochet (dc): Yarn over, insert hook in indicated st and pull up a loop (three loops on hook), yarn over, pull through two loops, yarn over, pull through remaining two loops on hook.
Back Post Double crochet (BPdc): Yarn over, insert hook from back to front to back around post of indicated stitch below (your hook should now be positioned horizontally behind the st that you’re working around), yarn over and pull up a loop, yarn over pull through two loops on hook (two loops on hook), yarn over, pull through remaining loops on hook.
Double crochet 5 together (dc5tog): The Double crochet 5 Together is a technique uses a series of double crochets into one stitch to create a cluster. To dc5tog, work 5dc all into the same stitch, leaving the last loop unworked on the hook each time. When you’ve got 6 loops on the hook, yarn over and pull through all six sts.
Picot Stitch: Picots are created by chaining the number of stitches called for in the pattern and then working a slip stitch in the indicated stitch or space. E.g. ch 3, insert hook back into the centre of the base st, yo, pull through all loops on hook.
PATTERN – PART 12
Part 12 in worked in the round onto the right side of the CAL;
IMPORTANT PATTERN NOTE:
For the border pattern we will add 1 extra st to a corner so there will be (3dc, ch2, 2dc) on rnd 3.
Rnd 1: Attach yarn with a sl st to the first st to any corner, Ch3 (Counts as first dc here and throughout, then work 1BPdc in each st and (2dc, ch2, 2dc) in ch2-sp until you reach the corner with your starting ch3, (2dc, ch2, 1dc), sl st to the top of the beginning ch3 to join. (1200dcs + 4 x 2ch-sps / 300dcs each side)
Rnd 2: Ch3, 1dc in each st around with [2dc,ch2, 2dc] in each corner ch2-sp, until last corner, 1dc in the last st, sl st to the top of the beginning ch3 to join (1216dcs + 4 x ch2-sps / 304dcs each side)
Rnd 3: Sl st to the next st, ch3, 1dc in the next 2sts, * ch1, miss next st, 1dc in the next st, ch1, miss next st, 1dc in the next 3sts * repeat from * to * around until the corner with 1dc in the next st [3dc,ch3, 2dc] in each corner ch2-sp, until last corner, 1dc in the next st, ch1, miss next st,1dc in the next st, ch1, miss next st, sl st to the top of the beginning ch3 to join. (828dcs + 408 x ch1-sps, 4 x ch3-sps / 207dcs each side, 102 x ch1-sps, 1 x ch3-sp per side)
Rnd 4: Sl st to the next st, ch2 (start of dc5tog) complete dc5tog in same st, * ch3, sl st to the top of the dc5tog (picot made), ch3, 1sc in the top of the single dc of rnd 3, ch3, miss (ch-sp and 1dc), dc5tog in next st * repeat from * to * around with [ch5, dc5tog, ch3, sl st to top of dc5tog, ch 5] in each corner ch2-sp until last corner is completed, 1sc in the top of the single dc of rnd 3, ch3, miss (ch-sp and 1dc), sl st to the top of the beginning dc5tog to join. Fasten off and weave in all ends. (204 x dc5tog including corners, 400 x ch3-sps. 204 picots and 4 x ch5-sps / 51 x dc5tog, 100 x ch3-sps, 50 picots (not including the corners) and 1 x ch5-sps per side).
See chart above for reference
And that’s it! We are all finished! I’ve added a little bit more time to the schedule for you to finish, or catch up, before I do a round up of all your wonderful blankets on 4 June, so please keep sharing! Happy hooking until then!
The Schedule, Updates & Support:
As always if you need a reminder of the schedule then you can find the details on the CAL landing page (here) and you can keep up to date with the CAL details and get support if needed via the following links:
As I may have mentioned before the Facebook group is a lovely place of support, there are crocheters in there of all experiences, with new crocheters joining all the time! It’s likely that someone will be able to help you with any questions you might have though of course you can always contact me too here on the blog if you need any help.
Thank you for crocheting along with me, it’s such a special thing to be crocheting along a pattern together.
Until next time; keep calm and crochet on my friends xx
Please note that some of the links in my blog are affiliate links. I may earn a small commission if you purchase via these links, but the price you pay is not affected. You can read more about my affiliate links here.
Edited: Following some errors on the written rnds of Part 11 this pattern was amended on 18 May, sorry for any confusion caused.
Here we are! The penultimate part of our Filet Fantastic Crochet Along! I’ve released Part 11 a little bit earlier because this is the biggest section of the CAL so thought you might appreciate a bit of a head start. This week we set up the border by going all the way around all the parts we have made so far!
Thank you for everyone who has been sharing their photos, I love to see how your blankets are developing. Below you can see just a few of the finished part 10’s, and some photos of other people who have just started the CAL and are catching up (amazing!), that have been shared on Ravelry, in the Facebook group and Instagram.
If you want to link your photos the hashtag for this years CAL is #KCACOUKCAL21 for Twitter and Instagram. Though you you can also join in with any progress photos by linking your projects on your favourite social media sites: Ravelry, my Facebook page or Facebook group and Pinterest.
If you are brand new to the CAL there’s is still plenty of time to join in with us. You can find all the information you need on the CAL landing page, where I’ll link all the CAL posts in one place as I add them here to the blog. Yarn packs are still available from the lovely folks at Black Sheep Wools and there are a number of CAL accessories that are also available from some fabulous small businesses (that I talked a little more about here).
During the duration of the CAL this pattern will be released part by part here on the blog and also via Ravelry updates in the form of a printer friendly PDF ebooklet that is available for purchase. Please note you will only have to purchase the pattern once, updates will be automatically added so your pattern is updated each week and at the end of the 12 weeks you will have the full pattern to keep. As with any purchase you make of my patterns your support of me and my crochet endeavours is very much appreciated – thank you for supporting my work!
If you are new to filet crochet you might find my blog post about ‘Top Tips for Filet Crochet’ useful on how to read filet crochet charts with some specific tips on the technique.
Filet Fantastic: Part 11 – Fancy Filet
335g / 871m or 7 balls of Scheepjes River Washed Colorado (Shade 941) or 4 balls of Scheepjes Colour Crafter in Dracten (1084).
Gauge: 5tr = 2.5cm (1inch). Gauge is not critical for this design, with each part I will provide the size of my work. If your gauge does not meet mine it will just mean you will end up with a bigger or smaller blanket. If you wish to match my gauge you might try going up a hook size if your tension is quite tight, or going down a hook size if your tension is looser.
Finished Size: Part 11 – 165 x 165 cm (65 x 65 inches)
The pattern below is in UK Terms, scroll down for US Terms:
BASIC FILET STITCHES
Beginning open block (beg open block): Ch4 (counts as first tr + ch-1), miss next st or ch, tr in the next st.
Open block: Ch1, miss next st, 1tr in the next st.
Beginning solid block (beg solid block): Ch3 (counts as first tr), tr in the next 2sts.
Block (Bl): 1tr in the next 2sts.
OTHER STITCH GUIDANCE
Slip Stitch (sl st): Insert hook in st indicated, yarn over and draw through all loops.
Double Crochet (dc): Insert hook in st indicated and pull up a loop (two loops on hook), yarn over, pull through both loops on hook.
Treble (tr): Yarn over, insert hook in indicated st and pull up a loop (three loops on hook), yarn over, pull through two loops, yarn over, pull through remaining two loops on hook.
PATTERN – PART 11
Part 11 is worked in the round onto the right side of the CAL;
IMPORTANT PATTERN NOTE:
On Rnd 1 we will be making sure that all the sides have the same number of stitches, to do this we will add 1 extra st at a relevant point;
Insert a marker every 25 or 50 stitches as you go along as this will make it easier to count the stitches at the end of the round to ensure you have the correct number
Rnd 1: Attach yarn with a sl st to the first st to the last row st post of Part 10 (top left hand corner);
Side 1: Ch3 (Counts as first tr here and throughout), then work, 1tr around the same post, 2tr around each remaining tr post of Part 10 (22sts), 1tr in each st of Part 9 (211sts) then work 2tr around each post tr of Part 10 until the last post (20sts), 3tr in the last post, (256sts)
Side 2: Ch2, 1tr in each st of side 10; including the top of the tr of the last post st of Part 10 (256sts)
Side 3: Repeat side 1
Side 4: Repeat side 2. Ch2, sl st to the top of the beginning ch3 to join.
(1024trs + 4 x 2ch-sps / 256sts per side)
Tip: Check that you have the correct stitch count for rnd 1 before continuing.
Rnd 2: Ch3, [ 1tr in the next 6sts, [[ch2, miss 2sts ] repeat from [ thirty times, 1tr in the last 7sts, (2tr,ch2, 2tr) in the ch2-sp for a corner, 1tr in the next 7sts, ]]. Repeat from [[ three times; on the third repeat, after the last corner in the ch2 -sp is made, sl st to the top of the beginning ch3 to join (792trs + 128 x ch2-sps / 198trs + 32 xch2-sps per side)
Rnd 3: Ch3, 1tr in the next 4sts, [[ [ ch3, miss 2sts, 1dc in the ch2-sp, ch3, miss 2sts, 1tr in the next 2sts ], repeat from [ thirty times, 1tr in the next 5sts, (2tr,ch2, 2tr) in the ch2-sp for a corner, 1tr in the next 7sts. ]] Repeat from [[ three times; on the third repeat continue after the last corner in the ch2 -sp is made, 1tr in the last 2 sts, sl st to the top of the beginning ch3 to join. (312trs, 124dcs, 248 x ch3-sps, 4 x ch2-sps / 78trs, 31dcs, 62 x ch3-sps, 1 x ch2-sp per side).
Note: On this rnd you will be counting your chains as a st, for example the last two tr’s of the first 6trs of rnd 4 will be worked into the ch’s of the ch3-sp.
If you want to just work into the ch-sps rather than the chs that won’t cause an issue as long as you make sure you have the correct number of sts at the end.
Rnd 4: Ch3, 1tr in the next 6sts, [[ [ ch2, miss (ch1, dc, ch1) from previous rnd, 1tr in the next 6sts (including chs) ] repeat from [ thirty times, 1tr in the last 11sts, (2tr,ch2, 2tr) in the ch2-sp for a corner, 1tr in the next 11sts, ]]. Repeat from [[ three times; on the third repeat continue after the last corner in the ch2 -sp is made, 1tr in the last 4sts, sl st to the top of the beginning ch3 to join. (824trs + 128 x ch2-sps / 206trs + 32 x ch2-sps per side)
Rnd 5: Ch3, 1tr in the next 2sts, [[ [ ch2, miss 2sts, 1tr in the next 6sts ] thirty times, ch2,miss 2sts, 1tr in the last 9sts, (2tr,ch2, 2tr) in the ch2-sp for a corner, 1tr in the next 9sts. Repeat from [[ three times; on the third repeat continue after the last corner in the ch2 -sp is made, 1tr in the last 6 sts, sl st to the top of the beginning ch3 to join. (832trs + 132 x ch2-sps / 208trs + 33 x ch2-sps per side)
Rnd 6: Ch3, [[ [ ch3, miss 2sts, 1dc in the ch2-sp, ch3, miss 2sts, 1tr in the next 2sts ] repeat from [ thirty times, ch3, miss 2sts, 1dc in the ch2-sp, ch3, miss 2sts, 1tr in the next 2sts (2tr,ch2, 2tr) in the ch2-sp for a corner, 1tr in the next 9sts. [[Repeat from [[ three times; on the third repeat continue after the last corner in the ch2 -sp is made, 1tr in the last 8 sts, sl st to the top of the beginning ch3 to join. (336trs, 128dcs, 256 x ch3-sps, 4 x ch2-sps / 84trs, 32dcs, 64 x ch3-sps, 1 x ch2-sp per side).
Rnd 7: Ch3, 1tr in the next 2sts, [[ [ ch2, miss (ch1, dc, ch1) from previous rnd, 1tr in the next 6sts (including chs) ] repeat from [ thirty times, ch2, miss (1ch, 1dc, 1ch), 1tr in the last 13sts, 1tr in the last 11sts, (2tr,ch2, 2tr) in the ch2-sp for a corner, 1tr in the next 13sts, ]]. Repeat from [[ three times; on the third repeat continue after the last corner in the ch2 -sp is made, 1tr in the last 10sts, sl st to the top of the beginning ch3 to join. (864trs + 132 x ch2-sps / 216trs + 33 x ch2-sps per side)
Rnd 8: Sl st in the next st, ch3, 1tr in the next 5sts, [[ [ch2, miss 2sts, 1tr in the next 6sts ], repeat from [ thirty-one times, ch2, miss 2sts, 1tr in the last 11sts, (2tr,ch2, 2tr) in the ch2-sp for a corner, 1tr in the next 11sts ]]. Repeat from [[ three times; on the third repeat continue after the last corner in the ch2 -sp is made, 1tr in the last 11 sts, ch2, miss 2sts, sl st to the top of the beginning ch3 to join. (872trs + 136 x ch2-sps / 218trs + 34 x ch2-sps per side)
Rnd 9: Sl st in the next 2sts, ch3, 1tr in the next st [[ [ ch3, miss 2sts, 1dc in the ch2-sp, ch3, miss 2sts, 1tr in the next 2sts ] repeat from [ thirty-one times, ch3, miss 2sts, 1dc in the ch2-sp, ch3, miss 2sts, 1tr in the next 11sts, (2tr,ch2, 2tr) in the ch2-sp for a corner, 1tr in the next 11sts ]] repeat from [[ three times until after the last ch2-sp, 1tr in the last 11 sts, ch3, miss 2sts, 1dc in the ch2-sp, ch3, miss 2sts, sl st to the top of the beginning ch3 to join. (360trs, 132dcs, 264 x ch3-sps, 4 x ch2-sps / 90trs, 33dcs, 66 x ch3-sps, 1 x ch2-sp per side).
Rnd 10: Ch3, 1tr in the next 3sts, [[ [ ch2, miss (1ch, 1dc, 1ch), 1tr in the next 6sts (including ch) ] repeat from [ thirty-one times, ch2, miss 2sts, 1tr in the last 15sts, (2tr,ch2, 2tr) in the ch2-sp for a corner, 1tr in the next 15sts, ]]. Repeat from [[ three times; on the third repeat continue after the last corner in the ch2 -sp is made, 1tr in the next 15sts, ch2, miss (1ch, 1dc, 1ch), 1tr in the last 2chs, sl st to the top of the beginning ch3 to join. (904trs + 136 x ch2-sps / 226trs + 34 x ch2-sps per side)
Rnd 11: Ch3 (counts as first tr) 1tr in each st and ch-sp around; working (2tr, ch2,2tr) in each corner, sl st to the top of the beginning ch3 to join. Fasten off and weave in ends. (1184tr each side + 4 x 2ch-sps / 296trs each side).
Chart for section of Part 11 below * There are more repeats than shown
Please see important pattern noteregarding the end stitch count.
Pattern in US Terms:
BASIC FILET STITCHES
Beginning open block (beg open block): Ch4 (counts as first dc + ch-1), miss next st or ch, dc in the next st.
Open block: Ch1, miss next st, 1dc in the next st.
Beginning solid block (beg solid block): Ch3 (counts as first dc), dc in the next 2 sts.
Block (Bl): 1dc in the next 2 sts. Where base sts are dc, work 1dc in each st; where base sts are ch1 and dc, work your dc over the ch1 (into the space) and next dc into the dc.
OTHER STITCH GUIDANCE
Slip Stitch (sl st): Insert hook in st indicated, yarn over and draw through all loops.
Single Crochet (sc): Insert hook in st indicated and pull up a loop (two loops on hook), yarn over, pull through both loops on hook.
Double Crochet (dc): Yarn over, insert hook in indicated st and pull up a loop (three loops on hook), yarn over, pull through two loops, yarn over, pull through remaining two loops on hook.
PATTERN – PART 11
Part 11 in worked in the round onto the right side of the CAL;
IMPORTANT PATTERN NOTE:
On Rnd 1 we will be making sure that all the sides have the same number of stitches, to do this we will add 1 extra st at a relevant point;
Insert a marker every 25 or 50 stitches as you go along as this will make it easier to count the stitches at the end of the round to ensure you have the correct number
Rnd 1: Attach yarn with a sl st to the first st to the last row st post of Part 10 (top left hand corner);
Side 1: Ch3 (Counts as first dc here and throughout), then work, 1dc around the same post, 2dc around each remaining dc post of Part 10 (22sts), 1dc in each st of Part 9 (211sts) then work 2dc around each post dc of Part 10 until the last post (20sts), 3dc in the last post, (256sts)
Side 2: Ch2, 1dc in each st of side 10; including the top of the dc of the last post st of Part 10 (256sts)
Side 3: Repeat side 1
Side 4: Repeat side 2. Ch2, sl st to the top of the beginning ch3 to join.
(1024dcs + 4 x 2ch-sps / 256sts per side)
Tip: Check that you have the correct stitch count for rnd 1 before continuing.
Rnd 2: Ch3, [ 1dc in the next 6sts, [[ch2, miss 2sts ] repeat from [ thirty times, 1dc in the last 7sts, (2dc,ch2, 2dc) in the ch2-sp for a corner, 1dc in the next 7sts, ]]. Repeat from [[ three times; on the third repeat, after the last corner in the ch2 -sp is made, sl st to the top of the beginning ch3 to join (792dcs + 128 x ch2-sps / 198dcs + 32 xch2-sps per side)
Rnd 3: Ch3, 1dc in the next 4sts, [[ [ ch3, miss 2sts, 1sc in the ch2-sp, ch3, miss 2sts, 1dc in the next 2sts ], repeat from [ thirty times, 1dc in the next 5sts, (2dc,ch2, 2dc) in the ch2-sp for a corner, 1dc in the next 7sts. ]] Repeat from [[ three times; on the third repeat continue after the last corner in the ch2 -sp is made, 1dc in the last 2 sts, sl st to the top of the beginning ch3 to join. (312dcs, 124scs, 248 x ch3-sps, 4 x ch2-sps / 78dcs, 31scs, 62 x ch3-sps, 1 x ch2-sp per side).
Note: On this rnd you will be counting your chains as a st, for example the last two dc’s of the first 6dcs of rnd 4 will be worked into the ch’s of the ch3-sp.
If you want to just work into the ch-sps rather than the chs that won’t cause an issue as long as you make sure you have the correct number of sts at the end.
Rnd 4: Ch3, 1dc in the next 6sts, [[ [ ch2, miss (ch1, sc, ch1) from previous rnd, 1dc in the next 6sts (including chs) ] repeat from [ thirty times, 1dc in the last 11sts, (2dc,ch2, 2dc) in the ch2-sp for a corner, 1dc in the next 11sts, ]]. Repeat from [[ three times; on the third repeat continue after the last corner in the ch2 -sp is made, 1dc in the last 4sts, sl st to the top of the beginning ch3 to join. (824dcs + 128 x ch2-sps / 206dcs + 32 x ch2-sps per side)
Rnd 5: Ch3, 1dc in the next 2sts, [[ [ ch2, miss 2sts, 1dc in the next 6sts ] thirty times, ch2,miss 2sts, 1dc in the last 9sts, (2dc,ch2, 2dc) in the ch2-sp for a corner, 1dc in the next 9sts. Repeat from [[ three times; on the third repeat continue after the last corner in the ch2 -sp is made, 1dc in the last 6 sts, sl st to the top of the beginning ch3 to join. (832dcs + 132 x ch2-sps / 208dcs + 33 x ch2-sps per side)
Rnd 6: Ch3, [[ [ ch3, miss 2sts, 1sc in the ch2-sp, ch3, miss 2sts, 1dc in the next 2sts ] repeat from [ thirty times, ch3, miss 2sts, 1sc in the ch2-sp, ch3, miss 2sts, 1dc in the next 2sts (2dc,ch2, 2dc) in the ch2-sp for a corner, 1dc in the next 9sts. [[Repeat from [[ three times; on the third repeat continue after the last corner in the ch2 -sp is made, 1dc in the last 8 sts, sl st to the top of the beginning ch3 to join. (336dcs, 128scs, 256 x ch3-sps, 4 x ch2-sps / 84dcs, 32scs, 64 x ch3-sps, 1 x ch2-sp per side).
Rnd 7: Ch3, 1dc in the next 2sts, [[ [ ch2, miss (ch1, sc, ch1) from previous rnd, 1dc in the next 6sts (including chs) ] repeat from [ thirty times, ch2, miss (1ch, 1sc, 1ch), 1dc in the last 13sts, (2dc,ch2, 2dc) in the ch2-sp for a corner, 1dc in the next 13sts, ]]. Repeat from [[ three times; on the third repeat continue after the last corner in the ch2 -sp is made, 1dc in the last 10sts, sl st to the top of the beginning ch3 to join. (864dcs + 132 x ch2-sps / 216dcs + 33 x ch2-sps per side)
Rnd 8: Sl st in the next st, ch3, 1dc in the next 5sts, [[ [ch2, miss 2sts, 1dc in the next 6sts ], repeat from [ thirty-one times, ch2, miss 2sts, 1dc in the last 11sts, (2dc,ch2, 2dc) in the ch2-sp for a corner, 1dc in the next 11sts ]]. Repeat from [[ three times; on the third repeat continue after the last corner in the ch2 -sp is made, 1dc in the last 11 sts, ch2, miss 2sts, sl st to the top of the beginning ch3 to join. (872dcs + 136 x ch2-sps / 218dcs + 34 x ch2-sps per side)
Rnd 9: Sl st in the next 2sts, ch3, 1dc in the next st [[ [ ch3, miss 2sts, 1sc in the ch2-sp, ch3, miss 2sts, 1dc in the next 2sts ] repeat from [ thirty-one times, ch3, miss 2sts, 1sc in the ch2-sp, ch3, miss 2sts, 1dc in the next 11sts, (2dc,ch2, 2dc) in the ch2-sp for a corner, 1dc in the next 11sts ]] repeat from [[ three times until after the last ch2-sp, 1dc in the last 11 sts, ch3, miss 2sts, 1sc in the ch2-sp, ch3, miss 2sts, sl st to the top of the beginning ch3 to join. (360dcs, 132scs, 264 x ch3-sps, 4 x ch2-sps / 90dcs, 33scs, 66 x ch3-sps, 1 x ch2-sp per side).
Rnd 10: Ch3, 1dc in the next 3sts, [[ [ ch2, miss (1ch, 1sc, 1ch), 1dc in the next 6sts (including ch) ] repeat from [ thirty-one times, ch2, miss 2sts, 1dc in the last 15sts, (2dc,ch2, 2dc) in the ch2-sp for a corner, 1dc in the next 15sts, ]]. Repeat from [[ three times; on the third repeat continue after the last corner in the ch2 -sp is made, 1dc in the next 15sts, ch2, miss (1ch, 1sc, 1ch), 1dc in the last 2chs, sl st to the top of the beginning ch3 to join. (904dcs + 136 x ch2-sps / 226dcs + 34 x ch2-sps per side)
Rnd 11: Ch3 (counts as first dc) 1dc in each st and ch-sp around; working (2dc, ch2,2dc) in each corner, sl st to the top of the beginning ch3 to join. Fasten off and weave in ends. (1184dc each side + 4 x 2ch-sps / 296dcs each side + 4 x 2ch-sps).
See chart above for reference
And that’s it! The biggest part of the CAL is now finished, all we have left is the border just to finish it off, it really won’t be long now until your wonderful blanket is all put together!
The Schedule, Updates & Support:
As always if you need a reminder of the schedule then you can find the details on the CAL landing page (here) and you can keep up to date with the CAL details and get support if needed via the following links:
As I may have mentioned before the Facebook group is a lovely place of support, there are crocheters in there of all experiences, with new crocheters joining all the time! It’s likely that someone will be able to help you with any questions you might have though of course you can always contact me too here on the blog if you need any help.
Thank you for crocheting along with me, it’s such a special thing to be crocheting along a pattern together.
Until next time; keep calm and crochet on my friends xx
Please note that some of the links in my blog are affiliate links. I may earn a small commission if you purchase via these links, but the price you pay is not affected. You can read more about my affiliate links here.
Wow how fast does the CAL seem to be speeding along, we’re on Part 10 already which means in a couple more weeks you could potentially have a finished blanket!
Thank you for everyone who has been sharing their photos, I love to see how your blankets are developing. Below you can see just a few of the finished part 9’s that have been shared on Ravelry, in the Facebook group and Instagram – I know some of you are still finishing off as it takes a little longer to get each section finished as we get bigger!
If you want to link your photos the hashtag for this years CAL is #KCACOUKCAL21 for Twitter and Instagram. Though you you can also join in with any progress photos by linking your projects on your favourite social media sites: Ravelry, my Facebook page or Facebook group and Pinterest.
If you are brand new to the CAL there’s is still plenty of time to join in with us. You can find all the information you need on the CAL landing page, where I’ll link all the CAL posts in one place as I add them here to the blog. Yarn packs are still available from the lovely folks at Black Sheep Wools and there are a number of CAL accessories that are also available from some fabulous small businesses (that I talked a little more about here).
During the duration of the CAL this pattern will be released part by part here on the blog and also via Ravelry updates in the form of a printer friendly PDF ebooklet that is available for purchase. Please note you will only have to purchase the pattern once, updates will be automatically added so your pattern is updated each week and at the end of the 12 weeks you will have the full pattern to keep. As with any purchase you make of my patterns your support of me and my crochet endeavours is very much appreciated – thank you for supporting my work!
If you are new to filet crochet you might find my blog post about ‘Top Tips for Filet Crochet’ useful on how to read filet crochet charts with some specific tips on the technique.
Filet Fantastic: Part 10 – Bobble Grid
Yarn: 166g / 431.6m or 4 balls of Scheepjes River Washed Wheaton (Shade 958) or 2 balls of Scheepjes Colour Crafter in Hengelo (1084).
Gauge: 5tr = 2.5cm (1inch). Gauge is not critical for this design, with each part I will provide the size of my work. If your gauge does not meet mine it will just mean you will end up with a bigger or smaller blanket. If you wish to match my gauge you might try going up a hook size if your tension is quite tight, or going down a hook size if your tension is looser.
Finished Size: Part 10 – 140 x 140 cm (55 x 55 inches)
The pattern below is in UK Terms, scroll down for US Terms:
BASIC FILET STITCHES
Beginning open block (beg open block): Ch4 (counts as first tr + ch-1), miss next st or ch, tr in the next st.
Open block: Ch1, miss next st, 1tr in the next st.
Beginning solid block (beg solid block): Ch3 (counts as first tr), tr in the next 2sts.
Block (Bl): 1tr in the next 2sts.
OTHER STITCH GUIDANCE
Slip Stitch (sl st): Insert hook in st indicated, yarn over and draw through all loops.
Treble (tr): Yarn over, insert hook in indicated st and pull up a loop (three loops on hook), yarn over, pull through two loops, yarn over, pull through remaining two loops on hook.
Puff Stitch (PS): Yarn over, insert hook in st, pull up loop (5 times), yarn over and pull through 9 loops, yo, and pull through last 2 loops
PATTERN – PART 10
You will build part 10 onto the right side of the CAL;
To set up making Part 10 you will be working on Parts 8 and 9
We will be adding rows, working from the bottom upwards, where there isn’t a st you will use post of the extra tr’s on Part 9 to add sts.
IMPORTANT PATTERN NOTE:
You will have an extra tr on the end of each row that is not shown on the chart. These stitches are important as they will help link future sections of the CAL.
Row 1: Attach yarn with a sl st around the post of the last row of Part 9; Ch3 (Counts as first tr here and throughout, then working on the same post, 1tr. Continue to work tr’s along the row working 1tr in each st and 2tr around each post tr of Part 8 until end, turn (257sts)
Note: As your blanket get’s bigger you might find it helps to insert a stitch marker every 25 or 50 stitches on row 1 to make it easier to count the stitches at the end of the row to ensure you have the correct number
Row 2: Ch3 (Counts as first tr here and throughout, 1tr in the next st, Bl, (Open Block) x 125, Bl, 1tr in the last st, turn
Row 3: Ch3, 1tr in the next st, Bl, (Open Block) x 2, PS, 1 tr in the next st, [ (Open Block) x 4, PS, 1tr in the next st] repeat from [ twenty three times, (Open Block) x 2, Bl, 1tr in the last st, turn
Row 4: Ch3, 1tr in the next st, Bl, (Open Block) x 4, [(Bl) x 2, (Open Block) x 3 ] repeat from [ twenty two times, (Bl) x 2, (Open Block) x 4, Bl, 1tr in the last st, turn
Row 5: Ch3, 1tr in the next st, Bl, (Open Block) x 2, [Bl, Open Block, (Bl) x 2, Open Block] repeat from [ twenty three times, Bl, (Open Block) x 2, Bl, 1tr in the last st, turn
Row 6: Ch3, 1tr in the next st, Bl, (Open Block) x 2, [ Bl, (Open Block) x 4 ] repeat from [ twenty three times, Bl, (Open Block) x 2, Bl, 1tr in the last st, turn
Row 7: Ch3, 1tr in the next st, Bl, (Open Block) x 2, [ Bl, Open Block, (Bl) x 2, Open Block ] repeat from [ twenty three times, Bl, (Open Block) x 2, Bl, 1tr in the last st, turn
Row 8: Ch3, 1tr in the next st, Bl, (Open Block) x 4,[ (Bl) x 2, (Open Block) x 3 ] twenty two times, (Bl) x 2, (Open Block) x 4, Bl, 1tr in the last st, turn
Row 9: Ch3, 1tr in the next st, Bl, (Open Block) x 2, PS, 1 tr in the next st, [ (Open Block) x 4, PS, 1tr in the next st] repeat from [ twenty three times, (Open Block) x 2, Bl, 1tr in the last st, turn
Row 10: Ch3, 1tr in the next st, Bl, (Open Block) x 125, Bl, 1tr in the last st, turn
Row 11: Ch3, 1 tr in each st and sp along until end. Fasten off and weave in ends.
Rows 12 – 22: Reattach yarn on the opposite side and repeat rows 1—11 of the pattern.
Chart for section of Part 10 below * There are more repeats than shown
Please see important pattern noteregarding the end stitch count.
Pattern in US Terms:
BASIC FILET STITCHES
Beginning open block (beg open block): Ch4 (counts as first dc + ch-1), miss next st or ch, dc in the next st.
Open block: Ch1, miss next st, 1dc in the next st.
Beginning solid block (beg solid block): Ch3 (counts as first dc), dc in the next 2 sts.
Block (Bl): 1dc in the next 2 sts. Where base sts are dc, work 1dc in each st; where base sts are ch1 and dc, work your dc over the ch1 (into the space) and next dc into the dc.
OTHER STITCH GUIDANCE
Slip Stitch (sl st): Insert hook in st indicated, yarn over and draw through all loops.
Double Crochet (dc): Yarn over, insert hook in indicated st and pull up a loop (three loops on hook), yarn over, pull through two loops, yarn over, pull through remaining two loops on hook.
Puff Stitch (PS): Yarn over, insert hook in st, pull up loop (5 times), yarn over and pull through 9 loops, yo, and pull through last 2 loops
PATTERN – PART 10
You will build part 10 onto the right side of the CAL;
To set up making Part 10 you will be working on Parts 8 and 9
We will be adding rows, working from the bottom upwards, where there isn’t a st you will use post of the extra dc’s on Part 9 to add sts.
IMPORTANT PATTERN NOTE:
You will have an extra dc on the end of each row that is not shown on the chart. These stitches are important as they will help link future sections of the CAL.
IMPORTANT PATTERN NOTE:
You will have an extra dc on the end of each row that is not shown on the chart. These stitches are important as they will help link future sections of the CAL.
IMPORTANT PATTERN NOTE:
You will have an extra dc on the end of each row that is not shown on the chart. These stitches are important as they will help link future sections of the CAL.
Row 1: Attach yarn with a sl st around the post of the last row of Part 9; Ch3 (Counts as first dc here and throughout, then working on the same post, 1dc. Continue to work dc’s along the row working 1dc in each st and 2dc around each post dc of Part 8 until end, turn (257sts)
Note: As your blanket get’s bigger you might find it helps to insert a stitch marker every 25 or 50 stitches on row 1 to make it easier to count the stitches at the end of the row to ensure you have the correct number
Row 2: Ch3 (Counts as first dc here and throughout, 1dc in the next st, Bl, (Open Block) x 125, Bl, 1dc in the last st, turn
Row 3: Ch3, 1dc in the next st, Bl, (Open Block) x 2, PS, 1dc in the next st, [ (Open Block) x 4, PS, 1dc in the next st] repeat from [ twenty three times, (Open Block) x 2, Bl, 1dc in the last st, turn
Row 4: Ch3, 1dc in the next st, Bl, (Open Block) x 4, [(Bl) x 2, (Open Block) x 3 ] repeat from [ twenty two times, (Bl) x 2, (Open Block) x 4, Bl, 1dc in the last st, turn
Row 5: Ch3, 1dc in the next st, Bl, (Open Block) x 2, [Bl, Open Block, (Bl) x 2, Open Block] repeat from [ twenty three times, Bl, (Open Block) x 2, Bl, 1dc in the last st, turn
Row 6: Ch3, 1dc in the next st, Bl, (Open Block) x 2, [ Bl, (Open Block) x 4 ] repeat from [ twenty three times, Bl, (Open Block) x 2, Bl, 1dc in the last st, turn
Row 7: Ch3, 1dc in the next st, Bl, (Open Block) x 2, [ Bl, Open Block, (Bl) x 2, Open Block ] repeat from [ twenty three times, Bl, (Open Block) x 2, Bl, 1dc in the last st, turn
Row 8: Ch3, 1dc in the next st, Bl, (Open Block) x 4,[ (Bl) x 2, (Open Block) x 3 ] twenty two times, (Bl) x 2, (Open Block) x 4, Bl, 1dc in the last st, turn
Row 9: Ch3, 1dc in the next st, Bl, (Open Block) x 2, PS, 1dc in the next st, [ (Open Block) x 4, PS, 1dc in the next st] repeat from [ twenty three times, (Open Block) x 2, Bl, 1dc in the last st, turn
Row 10: Ch3, 1dc in the next st, Bl, (Open Block) x 125, Bl, 1dc in the last st, turn
Row 11: Ch3, 1dc in each st and sp along until end. Fasten off and weave in ends.
Rows 12 – 22: Reattach yarn on the opposite side and repeat rows 1—11 of the pattern.
See chart above for reference
And that’s it! And that’s the end of our building blocks! We are now back to our square shape and in Part 11 (the biggest part of the CAL) we are going to be working our way around the whole blanket to join our sections together ready for the last part of the border.
The Schedule, Updates & Support:
As always if you need a reminder of the schedule then you can find the details on the CAL landing page (here) and you can keep up to date with the CAL details and get support if needed via the following links:
As I may have mentioned before the Facebook group is a lovely place of support, there are crocheters in there of all experiences, with new crocheters joining all the time! It’s likely that someone will be able to help you with any questions you might have though of course you can always contact me too here on the blog if you need any help.
Thank you for crocheting along with me, it’s such a special thing to be crocheting along a pattern together.
Until next time; keep calm and crochet on my friends xx
Please note that some of the links in my blog are affiliate links. I may earn a small commission if you purchase via these links, but the price you pay is not affected. You can read more about my affiliate links here.
Have you got that Friday feeling? It’s that time of the week where we look at a new CAL section, this time it’s Part 9 which means that there are only another 3 weeks until the end of our crochet-along!
I hope you are enjoying us crocheting along together, I have been just loving seeing how your unique and wonderful blankets have been developing. Below you can see just a few of the finished part 8’s that have been shared on Ravelry, in the Facebook group and Instagram – I know some of you are still finishing off as it takes a little longer to get each section finished as we get bigger!
If you want to link your photos the hashtag for this years CAL is #KCACOUKCAL21 for Twitter and Instagram. Though you you can also join in with any progress photos by linking your projects on your favourite social media sites: Ravelry, my Facebook page or Facebook group and Pinterest.
If you are brand new to the CAL there’s is still plenty of time to join in with us. You can find all the information you need on the CAL landing page, where I’ll link all the CAL posts in one place as I add them here to the blog. Yarn packs are still available from the lovely folks at Black Sheep Wools and there are a number of CAL accessories that are also available from some fabulous small businesses (that I talked a little more about here).
During the duration of the CAL this pattern will be released part by part here on the blog and also via Ravelry updates in the form of a printer friendly PDF ebooklet that is available for purchase. Please note you will only have to purchase the pattern once, updates will be automatically added so your pattern is updated each week and at the end of the 12 weeks you will have the full pattern to keep. As with any purchase you make of my patterns your support of me and my crochet endeavours is very much appreciated – thank you for supporting my work!
If you are new to filet crochet you might find my blog post about ‘Top Tips for Filet Crochet’ useful on how to read filet crochet charts with some specific tips on the technique.
Filet Fantastic: Part 9 – Bobble Flowers
Yarn: 130g / 338m or 3 balls of Scheepjes Riverwashed Tiber (Shade 958) or 130g / 338m or 2 balls of Scheepjes Colour Crafter in Brugge (1003).
Gauge: 5tr = 2.5cm (1inch). Gauge is not critical for this design, with each part I will provide the size of my work. If your gauge does not meet mine it will just mean you will end up with a bigger or smaller blanket. If you wish to match my gauge you might try going up a hook size if your tension is quite tight, or going down a hook size if your tension is looser.
Finished Size: Part 9 – 140 x 115 cm (55 x 45 inches)
The pattern below is in UK Terms, scroll down for US Terms:
BASIC FILET STITCHES
Beginning open block (beg open block): Ch4 (counts as first tr + ch-1), miss next st or ch, tr in the next st.
Open block: Ch1, miss next st, 1tr in the next st.
Beginning solid block (beg solid block): Ch3 (counts as first tr), tr in the next 2sts.
Block (Bl): 1tr in the next 2sts.
OTHER STITCH GUIDANCE
Slip Stitch (sl st): Insert hook in st indicated, yarn over and draw through all loops.
Treble (tr): Yarn over, insert hook in indicated st and pull up a loop (three loops on hook), yarn over, pull through two loops, yarn over, pull through remaining two loops on hook.
Puff Stitch (PS): Yarn over, insert hook in st, pull up loop (5 times), yarn over and pull through 9 loops, yo, and pull through last 2 loops
PATTERN – PART 9
You will build part 9 onto the right side of the CAL;
To set up making Part 9 you will be working on Parts 7 and 8
We will be adding rows, working from the bottom upwards, where there isn’t a st you will use post of the extra tr’s on Part 8 to add sts.
IMPORTANT PATTERN NOTE:
You will have an extra tr on the end of each row that is not shown on the chart. These stitches are important as they will help link future sections of the CAL.
Row 1: Attach yarn with a sl st around the post of the last row of Part 8; Ch3 (Counts as first tr here and throughout, then working on the same post, 1tr. Continue to work tr’s along the row working 1tr in each st and 2tr around each post tr of Part 6 until end, turn (213sts)
Note: As your blanket get’s bigger you might find it helps to insert a stitch marker every 25 or 50 stitches on row 1 to make it easier to count the stitches at the end of the row to ensure you have the correct number
Rows 2 – 3: Ch3 (Counts as first tr here and throughout, 1tr in the next st, (Open Block) x 105, 1tr in the last st, turn
Row 4: Ch3, 1tr in the next st, (Open Block) x 2, [ Bl, (Open Block) x 4 ] repeat from [ nineteen times, Bl, (Open Block) x 2, 1tr in the last st, turn
Row 5: Ch3, 1tr in the next st, Open Block, Bl, Open Block, Bl, [ (Open Block) x 2, Bl, Open Block, Bl, ] repeat from [ nineteen times, 1tr in the last st, turn
Row 6: Ch3, 1tr in the next st, Bl, [ Open Block, PS, 1tr in the next st, Open Block, (Bl) x 2 ] repeat from [ nineteen times, Open Block, PS, 1tr in the next st, Open Block, 1tr in the last st, turn
Row 7: Repeat row 5
Row 8: Repeat row 4
Rows 9-10: Repeat rows 2 and 3
Row 11: Ch3, 1 tr in each st and sp along until end. Fasten off and weave in ends.
Rows 12 – 22: Reattach yarn on the opposite side and repeat rows 1—11 of the pattern.
Chart for section of Part 9 below * There are more repeats than shown
Please see important pattern noteregarding the end stitch count.
Pattern in US Terms:
BASIC FILET STITCHES
Beginning open block (beg open block): Ch4 (counts as first dc + ch-1), miss next st or ch, dc in the next st.
Open block: Ch1, miss next st, 1dc in the next st.
Beginning solid block (beg solid block): Ch3 (counts as first dc), dc in the next 2 sts.
Block (Bl): 1dc in the next 2 sts. Where base sts are dc, work 1dc in each st; where base sts are ch1 and dc, work your dc over the ch1 (into the space) and next dc into the dc.
OTHER STITCH GUIDANCE
Slip Stitch (sl st): Insert hook in st indicated, yarn over and draw through all loops.
Double Crochet (dc): Yarn over, insert hook in indicated st and pull up a loop (three loops on hook), yarn over, pull through two loops, yarn over, pull through remaining two loops on hook.
Puff Stitch (PS): Yarn over, insert hook in st, pull up loop (5 times), yarn over and pull through 9 loops, yo, and pull through last 2 loops
PATTERN – PART 9
You will build part 9 onto the right side of the CAL;
To set up making Part 9 you will be working on Parts 7 and 8
We will be adding rows, working from the bottom upwards, where there isn’t a st you will use post of the extra tr’s on Part 8 to add sts.
IMPORTANT PATTERN NOTE:
You will have an extra dc on the end of each row that is not shown on the chart. These stitches are important as they will help link future sections of the CAL.
IMPORTANT PATTERN NOTE:
You will have an extra dc on the end of each row that is not shown on the chart. These stitches are important as they will help link future sections of the CAL.
Row 1: Attach yarn with a sl st around the post of the last row of Part 8; Ch3 (Counts as first dc here and throughout, then working on the same post, 1dc. Continue to work dc’s along the row working 1dc in each st and 2dc around each post dc of Part 6 until end, turn (213sts)
Note: As your blanket get’s bigger you might find it helps to insert a stitch marker every 25 or 50 stitches on row 1 to make it easier to count the stitches at the end of the row to ensure you have the correct number
Rows 2 – 3: Ch3 (Counts as first dc here and throughout, 1dc in the next st, (Open Block) x 105, 1dc in the last st, turn
Row 4: Ch3, 1dc in the next st, (Open Block) x 2, [ Bl, (Open Block) x 4 ] repeat from [ nineteen times, Bl, (Open Block) x 2, 1dc in the last st, turn
Row 5: Ch3, 1dc in the next st, Open Block, Bl, Open Block, Bl, [ (Open Block) x 2, Bl, Open Block, Bl, ] repeat from [ nineteen times, 1dc in the last st, turn
Row 6: Ch3, 1dc in the next st, Bl, [ Open Block, PS, 1dc in the next st, Open Block, (Bl) x 2 ] repeat from [ nineteen times, Open Block, PS, 1dc in the next st, Open Block, 1dc in the last st, turn
Row 7: Repeat row 5
Row 8: Repeat row 4
Rows 9-10: Repeat rows 2 and 3
Row 11: Ch3, 1 dc in each st and sp along until end. Fasten off and weave in ends.
Rows 12 – 22: Reattach yarn on the opposite side and repeat rows 1—11 of the pattern.
See chart above for reference
And that’s it! Only three more sections to go until your wonderful blankets are complete, it’s all onwards and upwards now to that finishing point when you weave in that last yarn tail of your blanket!
The Schedule, Updates & Support:
As always if you need a reminder of the schedule then you can find the details on the CAL landing page (here) and you can keep up to date with the CAL details and get support if needed via the following links:
As I may have mentioned before the Facebook group is a lovely place of support, there are crocheters in there of all experiences, with new crocheters joining all the time! It’s likely that someone will be able to help you with any questions you might have though of course you can always contact me too here on the blog if you need any help.
Thank you for crocheting along with me, it’s such a special thing to be crocheting along a pattern together.
Until next time; keep calm and crochet on my friends xx
Please note that some of the links in my blog are affiliate links. I may earn a small commission if you purchase via these links, but the price you pay is not affected. You can read more about my affiliate links here.
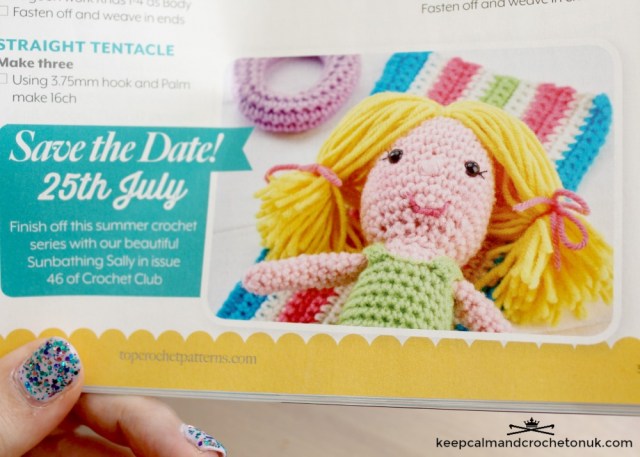
Are you ready to head to the beach with the second project of the Make it Today: Crochet Club magazine 3-part crochet-along? For the latest issue of the magazine I’ve designed a loveable and vibrant trio of sea-creatures including a sweet jellyfish and a couple of types of crab.
Following on from the fun crocheted beach hut we made for Part 1 of the crochet along may I introduce to you my fun take on a Lion’s Mane Jellyfish, an Edible Crab and a Hermit Crab – all species that you’d find along our UK shoreline.
I’m completely fascinated with sea creatures, well any animals really, and love nothing more than winding down by watching a natural history documentary (usually featuring David Attenborough) on TV with a bit of crochet at the end of the day.
The sea is such an interesting and varied place and the natural world is just a constant source of inspiration. I had fun making these projects, and I think they would work as a fun keyring for your keys if you were to add a ring and clip to the top of them.
Also in this issue there are some just delightful patterns! I love Rose the Red Panda by Sarah Louise Reed, she’s just so cute, and I also love the Colourful Cacti Plant covers by Corinne Bradd.
And there might just be a sneaky peep at what the last part 3 of the CAL is going to be below…
Part 3 of the beachy crochet along will be appearing in Issue 46 of Crochet Club magazine on Thursday July 25th – so save the date in your calendar!
If you missed the first part of the crochet-along, don’t worry, it’s available for free at topcrochetpatterns.com.
If you hook up the sea creature trio I hope you will please share your photos with me on social media (facebook, twitter or instagram) – I love to see what you make!
Until next time folks! Happy hooking, keep calm and crochet on my friends xx
The theme of the whole crochet-along is ‘beach’ and with each magazine release (Issues 44 to 46) we will be making several amigurumi patterns together that make a fun summer scene!
The patterns from the crochet-along would make a great summer play set for the kids or I also think, this particular project, would make a great bit of decor for an actual beach hut. Or if you were to add some beans to the bottom you could make it into a doorstop for a nautical themed room.
And there might just be a sneaky peep at what part 2 of the CAL is going to be below…
Part 2 of the beachy crochet along will be appearing in Issue 45 of Crochet Club magazine on Thursday June 20th – so save the date in your calendar!
This issue is particularly bright and appealing and the patterns I also love in this issue are the Rainbow the Giraffe by Sarah Louise Reed and the Sewlicious Doughnuts by Hannah Cooper.
If you hook up the Beach Hut I hope you will please share your photos with me on social media (facebook, twitter or instagram) – I love to see what you make!
Until next time folks! Happy hooking, keep calm and crochet on my friends xx
Our stitch story crochet along journey is at an end! But don’t worry if this is the first you are hearing about this CAL you can find the full schedule here and I promise to keep all the details on the blog FOREVER.
Now it’s time to fold up my blanket becauseI’m going to share some of the amazing finished Stitch Story Crochet blankets made by YOU!
But first I need to share Esther’s, from It’s All in A Nutshell, finished blanket! I know many of you really enjoyed Esther’s accompanying videos to the CAL and the link to her tutorials on her blog here (I’ve also added the link on the main CAL page). It’s so pretty in that colourway isn’t it (Scheepjes Riverwashed Shade Wheaton)!
I love that people have chosen to make blankets all in one colour like mine or multicoloured like my mums. All the colourways that were shared with me were fantastic and pretty but I have just selected a few different for inspiration purposes. So without further ado here are some unbelievably gorgeous blankets to feast your eyes on – and I’ve also added some of the stories the blanket owners have shared!
Made by Gerda for her daughter 💕
Made by Barbara and for her son who likes to steal this blanket to snuggle under! 💕
Ruby took joy in the creating of her beautiful blue blanket 💕
Made by Linda for her daughter who loved the gift 💕
Made in different tonal blues by Sara 💕
Lynn hooked 3 of each of the large blocks for her pretty blanket 💕
Elizabeth made only the little blocks and chose a lovely grouped arrangement 💕
Aren’t they just all stunning! Thanks again to everyone that joined in the CAL with me this year and that shared their beautiful work with me! I loved seeing your finished blankets 💕
I need at this point to say some quick thank you’s! I’ll try not to turn it into too much of an Oscar speech but I feel it’s important to acknowledge all the people behind the scenes that helped make this CAL happen!
Many thanks to Scheepjes for supplying the yarn for both blankets and so I could make this pattern for you. I need to thank Esther (It’s All in A Nutshell) for making the wonderful CAL video tutorials and to Iris who wonderfully translated the CAL from English to Dutch (which you can find on her blog Een Mooi Gebaar links to all the posts are here).
I need to say a MAHOOSIVE thank you to all the testers that helped with the colossal task of turning my scribbles into something legible for you all to make! Big shout outs to Jean, Steff, Dianne, Peggy, Kim, Leanne, Olwyn, Kimberlie, Jenn, Dulcy and Marie!
Thanks as always to my eldest daughter for posing in photos for me (even without marshmallow bribes!) and to my husband for driving round to find that perfect spot for a photo!
And I can’t write this post without thanking the lady without whom I just wouldn’t have ever finished two blankets in time. My lovely mum! I love the fact that we did this together and thank you for helping me with my crochet story, for your weaving in ends prowess and for rolling up your sleeves to just help me get it done! 💕
To be the first to find out about the crochet along for 2019 (later this year) you might like to subscribe to the blog here (if you haven’t already), sign up to my newsletter and / or join the KCACOUK Community Facebook group.
Until next time thank you for hooking along with me!
Nearing the end of a CAL is a bit like the end of a journey, many things will have happened since we started, and you will have undoubtedly woven some of your own stories and memories into your blanket. I hope you have enjoyed crocheting along with me, and I can’t wait to see your finished blankets.
If this is the first you are hearing about this CAL don’t worry the details will remain on the blog here pretty much forever so you can make your own blanket when you are able. You can find the full schedule and Scheepjes yarn amounts here and a link to the crochet along page here. More photos and the specifications and charts for the CAL can be found on the CAL Pinterest Board!
So let’s just quickly run through some of the pattern particulars…
Pattern:
This pattern is free here on the blog but it’s also available in an e-book on Ravelry. There is a small charge for the downloadable 46 page PDF e-book (payable once). The booklet has been released in instalments, along with the CAL, so as not to spoil anyone’s fun. This PDF has the full pattern descriptions, charts and information all in one place without adverts (as requested).
Through the course of this crochet-along I have provided you with patterns to make twelve different blocks, each in two different sizes. Which one you make is totally up to you! Make all one size or mix and match, whatever takes your fancy! However to give you a helping hand I have included some schematics which you can see on this post here.
A Dutch translation will be available by Iris from Een Mooi Gebaar (and a Dutch e-book will be coming soon to Ravelry). Link to the joining is available here.
For support with the Stitch Story CAL on Ravelry there is a thread facilitated by Reimy.
Accompanying CAL videos are being created by Esther from It’s All in a Nutshell. Link to to her video is below:
Social Media Links:
The hashtag for this years CAL is #SSCAL18 for Twitter and Instagram. Though you you can join in with any progress photos by linking your projects on your favourite social media sites: Ravelry, Facebook page or Facebook group and Pinterest.
Joining your blocks together
First you will need to work out how you want your finished blanket to look. The schematics that I used and my mum used for her blanket are below if you’d like to use those. You may find that playing with your squares on the floor and / or working out the layout of the blocks on a piece of paper helps enormously with working out your finished design.
Then to join each block together you can either sew them using a whipstitch or crochet them together using a sl st through the back loop of each st. I used the crochet method but I’ve put the details for crochet and whip-stitching the blocks together below. You could use another method for joining but you will need to make adjustments for the border.
Top tips for joining:
When possible you want to match the stitches one-for-one; when sewing the ends of rows / corners of blocks together you’ll need to look at the spaces for where to join and strive for consistency.
When the edges you’re seaming together are long, I’d advise using knit clips or stitch markers to hold the edges together so you can keep your work even.
Join your blocks in long strips where possible to keep the seams as neat as possible.
Whip-stitch:
Firstly put your two squares together with the wrong sides facing, when sewing the squares together, you will need to work under the BACK LOOPS (on the outside) only. Working in the BLO means there will be a less bulky seam.
With your sewing yarn in the needle insert the needle into the middle stitch (of your 3 dc/sc in each corner) of both blocks and begin stitching pulling the yarn through the loops and making sure to pull the entire length all the way through. Leave a tail of yarn about six inches long hanging from the end. Later, when you are finished whip stitching the squares together, you can to weave this end into the back of the closest block.
Insert the needle into the (back loop) of the next pair of stitches from bottom to top (or top to bottom which ever you find easiest for you) and pull gently to tighten
Repeat across your blocks, weave in ends and finish off the yarn.
Slip stitch join:
Put your two squares together with the wrong sides facing, you will need to work under the BACK LOOPS (on the outside) only. Working in the BLO means there will be a less bulky seam.
Insert your hook into the middle stitch (of your 3 dc/sc in each corner) of both blocks and begin slip stitching across the blocks, do not pull your sl sts too tightly as the seam will then bunch together.
Repeat across your blocks, weave in ends and finish off the yarn.
Post Stitch Rib Border
I thought that a post stitch rib border using front posts and back posts would be a perfect edging to tie everything in the blanket together. Post stitch ribbing produces a chunky border but do not crochet too tightly as you do not want the edge to become stiff and inflexible. Using a larger crochet hook might get you a softer, more flexible feel – see what works best for you.
Rnd 1: To set the blanket up for the border you need to be working in a multiple of 2sts. For my first round I evened up my sides by joining my yarn to a corner st (of a 3dc/sc corner) and worked 1 tr/dc in the back loop of each st around.
Note: If you have ended up with too many stitches for any reason this is the perfect time to decrease/increase where needed. I worked a tr3tog/dc3tog on each square seam (see photo on right) and in each the corner I worked 3 tr/dc (1012 sts).
Rnd 2: Ch2 (this counts as the first post st), * 1fptr/fpdc around the post of the next st, 1 bptr/bpdc around the next st * repeat from * to * working 3 tr/dc in each corner (see photo below) until the last st, sl st to join
Rnd 3: Repeat row 1, fasten off and weave in ends
Schematics
If you made a smaller blanket with less blocks then you may find Esther’s blanket schematic useful…
And that’s it! I hope you have enjoyed creating your very own unique blanket!
Until next time; keep calm and crochet on my friends xx
Well ladies and gents it’s time for the final block of the Stitch Story blanket! Then it’s just the joining and edging to go and we are done for this year’s crochet-along, and you will have a fabulous blanket all ready to use or gift at Christmas!
This next block is one of my favourites and was actually going to be the first block in the CAL as it utilises only very easy stitches, however it got moved to the end because it is one of those patterns that you have to concentrate on to get right, but I have included some helpful tips from my testers below.
If this is the first you are hearing about this CAL don’t worry the details will remain on the blog here pretty much forever so you can make your own blanket when you are able.
You can find the full schedule and Scheepjes yarn amounts here and a link to the crochet along page here. More photos and the specifications and charts for the CAL can be found on the CAL Pinterest Board!
So let’s just quickly run through some of the pattern particulars…
Pattern:
This pattern is free here on the blog but it’s also available in an e-book on Ravelry. There is a small charge for the downloadable 46 page PDF e-book (payable once). The booklet has been released in instalments, along with the CAL, so as not to spoil anyone’s fun. This PDF has the full pattern descriptions, charts and information all in one place without adverts (as requested).
Through the course of this crochet-along I have provided you with patterns to make twelve different blocks, each in two different sizes. Which one you make is totally up to you! Make all one size or mix and match, whatever takes your fancy! However to give you a helping hand I have included some schematics which you can see on this post here.
A Dutch translation was available by Iris from Een Mooi Gebaar (and a Dutch e-book will be coming soon to Ravelry). Link to Part 12 here.
For support with the Stitch Story CAL on Ravelry there is a thread facilitated by Reimy.
Accompanying CAL videos are being created by Esther from It’s All in a Nutshell. Link to Part 12 is below:
Social Media Links:
The hashtag for this years CAL is #SSCAL18 for Twitter and Instagram. Though you you can join in with any progress photos by linking your projects on your favourite social media sites: Ravelry, Facebook page or Facebook group and Pinterest.
Stitch Story…
Honeycomb: The symbol of a hard worker bee. It’s a lucky stitch signifying hard work and sweet rewards!
Design 12: The Bee Keeper
Hook: 4.5mm / US size 7 or size needed to obtain 15cm/6” square
Abbreviations (same for both blocks):
Chain (Ch)
Slip Stitch (sl st)
UK half treble / US half double crochet (htr/hdc)
Stitch Guidance (same for both blocks):
UK Half Double Treble / US Half Double Crochet (htr/hdc): Yarn over, insert hook in next st and pull up a loop (three loops on hook), yarn over, pull through all three loops on hook.
Working in the Back Loop Only: If you hold your piece of crochet in front of you with the Vs of the stitch on top, the part of the V closest to you is the front loop. The part of the V farther away from you on the opposite side is the back loop. When a pattern asks you to crochet into the back loop, insert your hook into the relevant loop and crochet as instructed.
15cm / 6 inch block:
Note: The ch1 at the beginning of a row, count as a st
Tip 1: If you struggle with twisting the row 1 try adding a row of dc/sc as row 1, then work row 1 as row 2 and so on (as seen in photo).
Tip 2: You might also find using stitch markers (or alternatives) to mark each row or where your last sl st, of each set of 5, helpful for this block.
Row 1 (WS): Ch 26, sl st into the 2nd ch from the hook and, sl st in the next 4sts * htr/hdc in the next 5 sts, sl st in the next 5 sts * repeat from * to * until the end of the row, turn (25 sts)
Note: From this point onwards work rows in the back loops only.
Row 2 (RS) : Ch1, htr/hdc in 5 sts, * sl st in 5 htr/hdc, htr/hdc in next 5 sts * repeat from * to * until the end of the row, turn.
Row 3: Ch1, 1htr/hdc in 5 htr/hdc, * sl st in 5 sts, 1htr/hdc in 5 htr/hdc * repeat from * to * until the end of the row, turn.
Row 4: Ch1, * Sl st in the 5 htr/hdc, 1htr/hdc in 5 sl sts, * repeat from * to * until the end of the row, turn.
Row 5: Ch1, * Sl st in the top of the 5 htr/hdc, 1htr/hdc in next 5 sl sts, * repeat from * to * until the end of the row, turn.
Row 6-25: Repeat rows 2-5, at the end of row 25 finish off and weave in ends.
The pattern does not use difficult stitches but it can be tricky to keep a tab on the rows so you know which row you are on. One of my testers made this very handy chart (below) which you might find helpful:
30cm / 12 inch block:
Hook: 4.5mm / US size 7 or size needed to obtain 30cm/12” square
Note: The ch2, at the beginning of a row, count as a st
Tip 1: If you struggle with twisting the row 1 try adding a row of dc/sc as row 1, then work row 1 as row 2 and so on (as seen in photo).
Tip 2: You might also find using stitch markers (or alternatives) to mark each row or where your last sl st, of each set of 5, helpful for this block.
Row 1 (WS): Ch 52, sl st into the 2nd ch from the hook and in the next 4sts * htr/hdc in the next 5 sts, sl st in the next 5 sts * repeat from * to * until the end of the row, turn (50 sts)
Note: From this point onwards work rows in the back loops only.
Row 2: (RS): Ch1, * Sl st in the 5 htr/hdc, htr/hdc in 5 sl sts, * repeat from * to * until the end of the row, turn.
Row 3: Ch1, htr/hdc in 5 sts, * sl st in 5 htr/hdc, htr/hdc in next 5 sts * repeat from * to * until the end of the row, turn.
Row 4: Ch1, htr/hdc in 5 htr/hdc, * sl st in 5 sts, htr/hdc in 5 htr/hdc * repeat from * to * until the end of the row, turn.
Row 5: Ch1, * Sl st in the top of the 5 htr/hdc, htr/hdc in next 5 sl sts, * repeat from * to * until the end of the row, turn.
Note: As you reach the later rows of your work please measure as you go along, depending on how loosely / tightly you crochet.
Row 6-49: Repeat rows 2-5, at the end of row 49 finish off and weave in ends.
Edging for all blocks:
On the right side of your work evenly work dc/sc along each side of your block working 3 dc/sc in each corner (25sts for smaller block / 50sts for larger block). Fasten off and weave in ends.
You do not need to use the same number of stitches I have for each square, you just need to evenly spread the single crochet border along the rows and edges. Whatever number edging you use just keep the same number of stitches for ALL of your blocks – with the same count of single crochet border on each edge then they will line-up when its time to turn them into a finished blanket.
And that’s it!
Until next time; keep calm and crochet on my friends xx