KCACO-UK Groovyghan CAL 2016 | Part 7

Group-Banner

Time for part 7 of our groovyghan! If this is the first you are hearing about this CAL the full schedule can be found here, to link the groovyghan project on Ravelry click here, or for just this pattern click here.  There is a Facebook support group for this CAL which can be found here and you can use the hashtag #kcacoukcal2016 for Facebook, Twitter, Pinterest and Instagram if you want to link in photos and such like on social media.  

For a print friendly version of this page please scroll to the bottom of this post and click on  the Print & PDF button.

Edited to add: This page has now been translated to by the lovely Sarit Grinberg: groovyghan-part7-hebrew

Part 7: Half and Half Granny Square:

The British halfpenny (½p) coin was introduced in February 1971 and although I was born in the late 70’s I still remember going to the local corner shop for ½ penny chews as a youngster!  To celebrate all half things part 7 is a half and half twist on the classic granny square.  

As with all the parts to this CAL I have included both the written pattern, chart and a photo tutorial of how I have made this pattern below.

02-Banner

Written Pattern:

skill3

Half and Half Granny Square (Make 10):

Notes:

  • Hook: UK 4 mm / US Size G
  • Yarn: Double Knit / 8 ply / Weight #3
  • Yarn Amount required: Each square roughly uses up 33 yds (30 m / 10 g) / Total squares 330 yds (300 m / 100 g)
  • Gauge in double knit / 8ply / yarn weight #3: 6 tr/dc sts or 2 clusters = 1.5 inches / 3.8 cm

If your gauge is different to mine e.g. because you are using a bigger hook and heavier weight yarn all you will need to do is check your own gauge and stick to it – this should mean that the pattern should fit together at the end.

  • Finished square size in double knit / 8ply / yarn weight #3: 5 x 5 inches / 12.7 x 12.7 cm

Pattern uses English (UK) and American (US) crochet terms for a conversion chart click here.

Abbreviations: 

  • st(s) = stitch(es)
  • sp(s) = space(s)
  • sl st = slip stitch
  • ch(s) = chain(s)
  • tr/dc  = UK treble / US double crochet
  • [ ] = work anything in brackets into one space or stitch as specified
  • Post = refers to either the tr/dc or ch 4 on the end of each rnd (used in the joining as you go section only).

Stitch Guidance: 

  • UK Treble / US Double Crochet (tr/dc): Yarn over, insert hook in indicated st and pull up a loop (three loops on hook), yarn over, pull through two loops, yarn over, pull through remaining two loops on hook.

Pattern:

  • Note: The blocks are made up from two half granny squares (triangles), you can either make 20 triangles and join together to make 10 half and half blocks OR you can join each triangle half as you go, details below.
  • Note 2: The Ch 4 at the beginning of each round counts as 1 tr/dc + ch 1
  • Note 3: Once you have completed each square I would suggest you weave in your ends and join your triangles together so that you don’t have a major sewing job to do at the end of the groovyghan!

Rnd 1: With YARN A, either ch 4 and sl st to form a ring OR start with a magic (adjustable ring). Ch 4, then work 3 tr/dc, 3 ch, 3 tr/dc, 1 ch, 1 tr /dc into the ring, turn (8 sts + 1 x 3 ch sp + 2 x 1 ch sp)

Rnd 2:  Ch 4, then in next ch 1 sp work 3 tr/dc, in the next ch 3 sp work [3 tr/dc, ch 3, 3 tr/dc], work 3 tr/dc in the last ch 1 sp, ch 1 then 1 tr/dc in the 3rd ch of beginning ch 4, turn (14 sts + 1 x 3 ch sp + 2 x 1 ch sp)

Rnd 3:  Ch 4, * work 3 tr/dc in the next ch 1 sp, 3 tr/dc in the next sp, then work work [3 tr/dc, ch 3, 3 tr/dc] in the next ch 3 sp, 3 tr/dc in the next sp, 3 tr/dc in the next ch 1 sp, ch 1 then 1 tr/dc in the 3rd ch of beginning ch 4, turn (20 sts + 1 x 3 ch sp + 2 x 1 ch sp)

Rnd 4:  Ch 4, * work 3 tr/dc in the next ch 1 sp, 3 tr/dc in the next 2 sps, then work work [3 tr/dc, ch 3, 3 tr/dc] in the next ch 3 sp, 3 tr/dc in the next 2 sps, 3 tr/dc in the next ch 1 sp, ch 1 then 1 tr/dc in the 3rd ch of beginning ch 4, turn (26 sts + 1 x 3 ch sp + 2 x 1 ch sp)

Rnd 5:  Ch 4, * work 3 tr/dc in the next ch 1 sp, 3 tr/dc in the next 3 sps, then work work [3 tr/dc, ch 3, 3 tr/dc] in the next ch 3 sp, 3 tr/dc in the next 3 sps, 3 tr/dc in the next ch 1 sp, ch 1 then 1 tr/dc in the 3rd ch of beginning ch 4, finish off and weave in ends (32 sts + 1 x 3 ch sp + 2 x 1 ch sp)

This makes 1 half granny triangle; see note 1 for options from this point or continue onto part 2 to join as you go.

Joining as you go part 2:

Rnd 6: Have your granny triangle right side facing and with the longest edge facing upwards, you will start off working from right to left.  With YARN B, sl st to the top of the last 1 tr/dc of rnd 1, then work [1 tr/dc, ch 1, 3 tr/dc, ch 3, 3 tr/dc, ch 1, 1 tr/dc] in the ch 4 or magic (adjustable) ring that you started with, then sl st to the top of the beginning ch 4 to join ( 8 sts + 1 x 3 ch sp + 2 x 1 ch sp)

TUT+logo

Rnd 7:  Ch 3, sl st around the end post of rnd 2, turn, ch 1, work 3 tr/dc in the next ch 1 sp, work [3 tr/dc, ch 3, 3 tr/dc] in the 3 ch sp, work 3 tr/dc in the last ch 1 sp, ch 1, 1 tr/dc in the top of the last tr/dc of previous rnd, sl st around the last post of rnd 2 to join (14 sts + 1 x 3 ch sp + 2 x 1 ch sp)

Rnd 8: Ch 3, sl st around the end post of rnd 3, turn, ch 1, work 3 tr/dc in the next ch 1 sp, then work 3 tr/dc in the next sp, work [3 tr/dc, ch 3, 3 tr/dc] in the 3 ch sp, 3 tr/dc in the next sp, then work 3 tr/dc in the last ch 1 sp, ch 1, 1 tr/dc in the top of the last tr/dc of previous rnd, sl st around the last post of rnd 3 to join (20 sts + 1 x 3 ch sp + 2 x 1 ch sp)

Rnd 9: Ch 3, sl st around the end post of rnd 4, turn, ch 1, work 3 tr/dc in the next ch 1 sp, then work 3 tr/dc in the next 2 sps, work [3 tr/dc, ch 3, 3 tr/dc] in the 3 ch sp, 3 tr/dc in the next 2 sps, then work 3 tr/dc in the last ch 1 sp, ch 1, 1 tr/dc in the top of the last tr/dc of previous rnd, sl st around the last post of rnd 4 to join (26 sts + 1 x 3 ch sp + 2 x 1 ch sp)

Rnd 10: Ch 3, sl st around the end post of rnd 5, turn, ch 1, work 3 tr/dc in the next ch 1 sp, then work 3 tr/dc in the next 3 sps, work [3 tr/dc, ch 3, 3 tr/dc] in the 3 ch sp, 3 tr/dc in the next 3 sps, then work 3 tr/dc in the last ch 1 sp, ch 1, 1 tr/dc in the top of the last tr/dc of previous rnd, sl st around the last post of rnd 5 to join, finish off and weave in ends (32 sts + 1 x 3 ch sp + 2 x 1 ch sp)

See below for details on blocking and joining your squares together to complete Part 1 of the CAL and below that a photo tutorial for the pattern.

Chart:   

Apologies in advance for my rather wonky looking square! For crochet symbols in English (UK) and American (US) crochet terms click here.

KCACOUKCAL2016-PART7.jpg

Blocking:

Some of the patterns in the CAL may need to be ‘blocked’ so that they are equal on all sides (not curling) and fit the size dimensions of the pattern.   If you are unfamiliar with what blocking means / or how to do it then please check out the following links:

You may already have blocking boards to hand but if not anything you can firmly pin your square to will do e.g. a folded up towel or an ironing board.

Part 7 finished square size in double knit / 8ply / yarn weight #3 should be 5 x 5 inches / 12.7 x 12.7 cm (your block maybe slightly larger if using worsted / aran / 10ply / yarn weight #4)

Blocking.jpg

Joining:

  • Tip 1: Use stitch markers or knit clips to hold your squares steady and lined up whilst you join them together.
  • Tip 2: Do not pull your yarn too tight when working your joins. Generally you should have the same sort of stretch that the crochet squares have.

Join your granny squares together in one long strip for PART 7 (please refer to the CAL schematic below for details) by slip stitching in the front loop only on the wrong side of the work; 

  1. line up your blocks so the edges and stitches match,
  2. then start sl st in the front loop only, starting at the last ch of a ch 3 sp, and along each edge, working the stitches through both squares and joining on the first ch of the ch 3 sp – 17 sts in total joined.

Groovyghan-Numbered-Part7

Photo Tutorial:

Half and Half Granny Square (Make 10):

Rnd 1: With YARN A, either ch 4 and sl st to form a ring OR start with a magic (adjustable ring). Ch 4, then work 3 tr/dc, 3 ch, 3 tr/dc, 1 ch, 1 tr /dc into the ring, turn (8 sts + 1 x 3 ch sp + 2 x 1 ch sp)

TUT-01

Rnd 2:  Ch 4, then in next ch 1 sp work 3 tr/dc, in the next ch 3 sp work [3 tr/dc, ch 3, 3 tr/dc], work 3 tr/dc in the last ch 1 sp, ch 1 then 1 tr/dc in the 3rd ch of beginning ch 4, turn (14 sts + 1 x 3 ch sp + 2 x 1 ch sp)

TUT-02

Rnd 3:  Ch 4, * work 3 tr/dc in the next ch 1 sp, 3 tr/dc in the next sp, then work work [3 tr/dc, ch 3, 3 tr/dc] in the next ch 3 sp, 3 tr/dc in the next sp, 3 tr/dc in the next ch 1 sp, ch 1 then 1 tr/dc in the 3rd ch of beginning ch 4, turn (20 sts + 1 x 3 ch sp + 2 x 1 ch sp)

TUT-03

Rnd 4:  Ch 4, * work 3 tr/dc in the next ch 1 sp, 3 tr/dc in the next 2 sps, then work work [3 tr/dc, ch 3, 3 tr/dc] in the next ch 3 sp, 3 tr/dc in the next 2 sps, 3 tr/dc in the next ch 1 sp, ch 1 then 1 tr/dc in the 3rd ch of beginning ch 4, turn (26 sts + 1 x 3 ch sp + 2 x 1 ch sp)

TUT-05

Rnd 5:  Ch 4, * work 3 tr/dc in the next ch 1 sp, 3 tr/dc in the next 3 sps, then work work [3 tr/dc, ch 3, 3 tr/dc] in the next ch 3 sp, 3 tr/dc in the next 3 sps, 3 tr/dc in the next ch 1 sp, ch 1 then 1 tr/dc in the 3rd ch of beginning ch 4, finish off and weave in ends (32 sts + 1 x 3 ch sp + 2 x 1 ch sp)

This makes 1 half granny triangle; see note 1 for options from this point or continue onto part 2 to join as you go.

Joining as you go part 2:

Rnd 6: Have your granny triangle right side facing and with the longest edge facing upwards, you will start off working from right to left.  With YARN B, sl st to the top of the last 1 tr/dc of rnd 1, then work [1 tr/dc, ch 1, 3 tr/dc, ch 3, 3 tr/dc, ch 1, 1 tr/dc] in the ch 4 or magic (adjustable) ring that you started with, then sl st to the top of the beginning ch 4 to join ( 8 sts + 1 x 3 ch sp + 2 x 1 ch sp)

TUT+logo

Rnd 7:  Ch 3, sl st around the end post of rnd 2, turn, ch 1, work 3 tr/dc in the next ch 1 sp, work [3 tr/dc, ch 3, 3 tr/dc] in the 3 ch sp, work 3 tr/dc in the last ch 1 sp, ch 1, 1 tr/dc in the top of the last tr/dc of previous rnd, sl st around the last post of rnd 2 to join (14 sts + 1 x 3 ch sp + 2 x 1 ch sp)

TUT-06

Rnd 8: Ch 3, sl st around the end post of rnd 3, turn, ch 1, work 3 tr/dc in the next ch 1 sp, then work 3 tr/dc in the next sp, work [3 tr/dc, ch 3, 3 tr/dc] in the 3 ch sp, 3 tr/dc in the next sp, then work 3 tr/dc in the last ch 1 sp, ch 1, 1 tr/dc in the top of the last tr/dc of previous rnd, sl st around the last post of rnd 3 to join (20 sts + 1 x 3 ch sp + 2 x 1 ch sp)

TUT-07

Rnd 9: Ch 3, sl st around the end post of rnd 4, turn, ch 1, work 3 tr/dc in the next ch 1 sp, then work 3 tr/dc in the next 2 sps, work [3 tr/dc, ch 3, 3 tr/dc] in the 3 ch sp, 3 tr/dc in the next 2 sps, then work 3 tr/dc in the last ch 1 sp, ch 1, 1 tr/dc in the top of the last tr/dc of previous rnd, sl st around the last post of rnd 4 to join (26 sts + 1 x 3 ch sp + 2 x 1 ch sp)

TUT-08

Rnd 10: Ch 3, sl st around the end post of rnd 5, turn, ch 1, work 3 tr/dc in the next ch 1 sp, then work 3 tr/dc in the next 3 sps, work [3 tr/dc, ch 3, 3 tr/dc] in the 3 ch sp, 3 tr/dc in the next 3 sps, then work 3 tr/dc in the last ch 1 sp, ch 1, 1 tr/dc in the top of the last tr/dc of previous rnd, sl st around the last post of rnd 5 to join, finish off and weave in ends (32 sts + 1 x 3 ch sp + 2 x 1 ch sp)

04

And that’s it! Part 7 completed!

Don’t forget to stay tuned for Part 8 to be released on 20th April 2016.

The KCACO-UK Afghan CAL 2015 – BIG REVEAL!!!

It’s here! It’s here! It’s time!!! The END of the 2015 Keep Calm and Crochet On UK Afghan CAL!  But don’t worry if this is the first you are hearing about this CAL you can find the full schedule here and I promise to keep all the details on the blog FOREVER x

First I want to say a few thank you’s! Ooo it feels a bit like the Oscars doesn’t it! I wanted to take this opportunity to say thank you once again to all the lovely designers that were kind enough to let me use their designs as part of the CAL (see the full list here). I also want to thank the fabulous admins (Kimberlie, Michelle, Jenn & Kat x) of the Facebook group for their support throughout the year. Finally I want to thank YOU all for crocheting along with me! So many more of you joined in this project than I ever imagined! I hope you have enjoyed crocheting a-long with me as much as I’ve enjoyed seeing all the fabulous work that you have shared with me.  

And now… the moment we’ve all been waiting for…the BIG REVEAL!

Tah-Dah!!!  My finished multi-square Afghan blanket!

05+Text

It’s unbelievably tricky to try and get a photo of a blanket this large, mine fits most comfortably over a single bed with some overlap but I just about managed it!  It’s annoying though how the lovely dark purple that I used comes out as blue on my camera sometimes so these aren’t quite the true colours that I actual chose (see them here). 

I’m really pleased with how the finished blanket has turned out.  It’s the biggest thing I have made to date…

02+Text

It’s been great joining it together whilst the weather has been turning colder as it’s been keeping me lovely and warm, and I did joke to my husband that I might have to keep it for myself.  But the little person for whom this blanket was intended has been eagerly waiting for me to finish…and she LOVES her new blanket (and yes she is wearing make-up from a pamper birthday party that she went to and yes she then refused to take off!)

03+Text

The finished blanket was quickly claimed hot of the hook and what followed was lots of gleeful rolling about in finished the blanket…

04+text

And that’s, almost literally in the case of Little G, a wrap! But don’t despair…I have some new CAL plans for 2016 so watch this space for details coming soon!

Thank you all again, for crocheting-a-long with me this year! I can’t wait to see your fabulous finished Afghans – some of which, with kind permission, I’ll be sharing this week!

KCACO-UK Afghan CAL 2015 | Crab Stitch Crochet Join for Afghan Blocks

Ends

Soooo it’s time to start joining our blocks together for the 2015 CAL! For my joins I really wanted something that would create a ‘frame’ for each of our unique squares.  I wanted something that was slightly raised (to compliment the 3-D blocks we’ve used) and something that would add a bit of texture (because you can NEVER have too much texture!).

So I started looking around and there are some really lovely joins out there, (check out Moogly’s round up of joins here and some ideas from Craft Passion here), but they just weren’t right for the idea I’d got in my head about how I wanted my end blanket to look.

Now I’m a big fan of crab stitch (or reverse UK double crochet / US single crochet) it is definitely my go to edging because I just love how it looks! So I wondered about using crab stitch to join my blocks and once I’d tried it I absolutely LOVED it as a joining method!!!   The nice thing about a crab stitch join is that, as with single crochet join, it doesn’t matter if you have an odd or even number of stitches on the sides of your blocks – plus it’s really quick to join blocks with too.

See below my tutorial on how to do crab stitch and how to use it to join your afghan blocks together.  For anyone who just can’t get along with crocheting backwards you might want to try this tutorial I have seen on My Hobby is Crochet for a Twisted Single Crochet.  This stitch is like crab stitch, but moving forward instead of backwards.

Crab Stitch Tutorial

Crab Stitch (or reverse UK double crochet / US single crochet) is made by doing dc/sc crochet stitches backwards!  If you are right-handed you will work the crab stitch from left to right, and if you are left-handed you will work from right to left.

  1. Sl st your yarn into your first st, 

CS-01

2. Insert hook into stitch to the right (or left) then yarn over once (just like a dc/sc)

CS-02

3.  Pull the yarn through the st (you should now have two loops on your hook).

CS-03

4. Yarn over again, and pull through both loops on your hook – and that’s it, your first crab stitch made.

CS-04

 5. Keep working in this manner to make your edge (or in our case in a moment your join). Nice and simple and absolutely yummy in it’s textural glory!

CS-05

Crab Stitch Join

You will need to have already made your preparations for joining up your blocks which I talked about here.

Tip 1: Use stitch markers or knit clips to hold your squares steady and lined up whilst you join them together.

Tip 2: Do not pull your yarn too tight when working your joins. Generally you should have the same sort of stretch that the crochet squares have.

  1. With the right sides of both your blocks facing outwards, line up your blocks so the edges and stitches match then start your crab stitch along one edge, working the stitches through both squares,  to join.

Join-01

2. When you get to the end of the row hold your next two edges together and continue to work your crab stitch straight across. Continuing working in this way until you have joined eight squares together in a long row.  At the end of the row, fasten off and weave in your ends.  Do the same for all your horizontal rows.

Join-02

3. Next work the vertical rows in the same way.

Join-03

So that’s the join! I’m not going to show you the whole of my blanket yet…I’m saving it for the big reveal!  Next week though we’ll look at adding our border – don’t forget to check back on 9th December.

KCACO-UK Afghan CAL 2015 – Block 24

This is it folks! The very last block in the CAL! Sometimes it really doesn’t seem so long ago since we started does it – but here we are ready to hook up our remaining square.

However, we are not quite finished yet! After today we still have the joining and the border to do which I have actually realised I haven’t provided you all with a huge amount of time for.  So to allow catching up time and actually doing the joining and borders I’m changing the the end dates slightly…make sure you check out important next steps at the bottom of this post too!

  • Joining squares together details will now be released on: 2nd December 
  • Border details will be released: 9th December
  • Grand reveal of our blankets: 16th December

How does that sound to everyone? Better? And don’t worry if this is the first you are hearing about this CAL you can find the full schedule  here and I promise to keep all the details on the blog FOREVER x

Okay lets get onto the last block…

Click on the link in the title below to go straight to the pattern or add it to your Ravelry queue. This square is currently free on Ravelry and has been since September 2015.

Mountain Majesties by Funny dieBarbarin

Notes:

  • Hook: UK 5.5 mm / US Size I
  • Yarn: Aran / 10 ply / Worsted / Weight #4
  • Colours: Works best in at least 3 different colours
  • Pattern uses American crochet terms: see the following link for a printable conversion chart: https://www.pinterest.com/pin/70437470329344/

Specialist stitches:

  • Air dc: Holding tail of yarn with finger on hook YO twice. Insert hook into starting space/stitch, YO, and draw through space/stitch. YO and draw through two loops, YO and draw through two loops. After working next stitch tail may be let go of.
  • Air sc: With yarn on hook (using slip knot if needed), work an sc into designated stitch.
  • Beginning dc: Any of the following, as preferred. (sl st, ch3), standing dc, or air dc.
  • Beginning sc: Any of the following, as preferred. (sl st, ch1, sc), air sc, standing sc.
  • FPDTR: YO three times, insert hook from front of work across back of designated stitch and return to front of work then YO, [YO and draw through two loops]four times. 
  • Standing dc: Raise loop to same height as a dc stitch. Twist loop in a clockwise motion. Place finger on top of loop to help hold in place and insert hook behind both strands of loop. YO and bring around. YO and draw through two loops, YO and draw through last two loops.
  • Standing sc: Without using a ch1 for height, work a sc as normal.
  • FPTR: YO two times, insert hook from front of work across back of designated stitch and return to front of work then YO, [YO and draw through two loops]three times.
  • FPTTR: YO four times, insert hook from front of work across back of designated stitch and return to front of work then YO, [YO and draw through two loops]five times.
  • V-stitch: Work (dc, ch2, dc) into same stitch YO: yarn over

My Version:

Ta dah!! This is my version of this square using my colour palette (I blogged about this here).  This was a really fun square to finish off on, I really love how the border is done, I think it looks so effective! I didn’t add the last row of tr/dc changing it instead to dc/sc to make it up to the 12 inches; you may wish to measure as you go for the last few rounds to check you meet your size.  It’s unfortunate with these dark UK winter days that I couldn’t get enough light to get, what I would class, as a proper photo as it really is a gorgeous block!

02+Logo

01+Logo

Getting Ready for Joining!

So to get ready to join all your blocks together I would suggest that you:

  1. Either check the end pattern count or count manually the stitches for the last row on all your blocks and write it down on a piece of paper.
  2. Then you will need to decide how many stitches you want each block to have – use a ch 2 in each corner for ease of joining.
  3. Then add either 1 rnd of dc /sc  (or alternative stitches like htr/hdc or tr/dc to add height if required) to either add or decrease stitches to your required amount.
  4. Then have a bit of fun trying to work out how you want the layout of your blanket to be by swapping all your squares about until you are pleased with how it looks.  Write down your plan on a bit of paper and save it for 2nd December.

KCACO-UK Afghan CAL 2015 – Block 23

Can you believe that this is the second to last block?!? I really doesn’t seem that long ago when we started block 1!  So without further ado lets get onto our next block…

Though if this is the first you are hearing about this CAL you can find the full schedule  here.

Click on the link in the title below to go straight to the pattern or add it to your Ravelry queue. This square is currently free on Ravelry and has been since November 2013.

Frostbloom 12″ Afghan Square by Shan Sevcik

Notes:

  • Hook: UK 5.5 mm / US Size I
  • Yarn: Aran / 10 ply / Worsted / Weight #4
  • Colours: Works best in at least 4 different colours
  • Pattern uses American crochet terms: see the following link for a printable conversion chart: https://www.pinterest.com/pin/70437470329344/

Specialist stitches:

  • Back loop only (BLO):Work new stitch in back loop of indicated stitch only.
  • V Stitch (V st):Work (dc, ch 1, dc) in indicated stitch. If you chain tightly or the round bows up, please feel free to chain 2.
  • Extended dc (edc): yo, insert hook in st, yo and pull through (3 loops on hook), yo and pull through 1 loop (still 3 loops on hook), yo, pull through two loops (2 loops on hook), yo and pull through remaining 2 loops.

My Version:

Ta dah!! This is my version of this square using my colour palette (I blogged about this here).   I just love, love, love the ruffle on this one and thought it would fit in nicely with some of the other 3-D squares that we have made. 

05+Logo

04+Text

Don’t forget to stay tuned for the LAST block to be released on  25th (or 26th) November.

KCACO-UK Afghan CAL 2015 -Block 22

So it’s time for block 22  and it’s a brand NEW design from me!  Born out of my own desire to learn how to do Bavarian crochet our next block ticks that off my to do list and brings, what I hope you will agree, a fun addition to the CAL.

I’m not going to lie, Bavarian crochet is a little tricky to master at first but once you get into the swing of it you should be fine!  I have added photos of the first 6 rnds in the pattern as extra guidance but should you find it just not to your taste a list of alternative blocks you could use can be found here. If this is the first you are hearing about this CAL the full schedule can be found here.

Click on the link in the title below to go straight to the pattern or add it to your Ravelry queue. This square is currently free on Ravelry and will be forever.

Bavarian Beauty by Heather C Gibbs

BB01+Logo

Notes:

  • Hook: UK 5.5 mm / US Size I
  • Yarn: Aran / 10 ply / Worsted / Weight #4
  • Colours: Works best in at least 4-5 different colours
  • Pattern uses UK and American crochet terms.

Specialist stitches:

  • UK Half Double Treble / US Half Double Crochet (htr/hdc): Yarn over, insert hook in next st and pull up a loop (three loops on hook), yarn over, pull through all three loops on hook.
  • UK Double Treble / US Treble (dtr/tr): Yarn over twice, insert hook in next st and pull up a loop (four loops on hook), yarn over, pull through two loops, yarn over, pull through two loops, yarn over, pull through remaining two loops on hook.
  • UK Double Treble 4 together / US Treble 4 together (dtr4tog/tr4tog): * Yarn over hook twice, insert hook in next stitch, yarn over hook, pull yarn through stitch (4 loops on the hook), yarn over and pull through 2 loops on hook (3 loops left), yarn over and pull through 2 loops on the hook (2 loops left) * repeat * to * 3 times, yarn over and pull through all 5 loops on the hook.
  • UK 4 Back Post Double Treble Decrease / US 4 Back Post US Treble Decrease (4 BPdtr-dec/4 BPtr-dec): When working back post sts you insert hook from back to front to back around post of indicated stitch (your hook should now be positioned horizontally behind of the st that you’re working around). * Yarn over hook twice, insert hook around post of indicated st, yarn over hook, drawn yarn through stitch, (yarn over hook, draw yarn through 2 loops on hook) twice * repeat * to * 3 times around the next 3 st posts, yarn over hook, draw yarn through 5 loops on hook.
  • UK 8 Back Post Double Treble Decrease / US 8 Back Post US Treble Decrease (8 BPdtr-dec/8 BPtr-dec): Working the same as the 4 BPdtr-dec/4 BPtr-dec but continuing to * hold the last loop of each stitch on hook, bptr/bptr around each of next 4 stitches *, skip sl st between sts and then on next group of dtr/tr’s, repeat * to * once, yarn over, pull through all loops on hook. 

My Version:

Ta dah!! This is my version of this square using my colour palette (I blogged about this here).  I did enjoy doing the Bavarian crochet though it can be a bit fiddly if you use a covered hook with the 8 BPdtr-dec/8 BPtr-dec’s.  It was also fun to work out the colour placement and I know that you guys are going to come up with some amazing combinations – can’t wait to see!

BB05+Logo

BB03+Logo

Don’t forget to stay tuned for the next block to be released on 11th or 12th November.

KCACO-UK Afghan CAL 2015 -Block 21

Throughout this CAL I have been trying to look for blocks that are all a little different so our resulting Afghan will be a multitude of creativity and fun!  That’s why I love this next block; stripes, ruffles, texture, segments…there really is something for everyone! 

If this is the first you are hearing about this CAL the full schedule can be found here.

Click on the link in the title below to go straight to the pattern or add it to your Ravelry queue. This square is currently free on Ravelry and has been since Feburary 2015.

 Fan Club by Polly Plum

Notes:

  • Hook: UK 5.5 mm / US Size I
  • Yarn: Aran / 10 ply / Worsted / Weight #4
  • Colours: Works best in at least 4-5 different colours
  • Pattern uses American crochet terms: see the following link for a printable conversion chart: https://www.pinterest.com/pin/70437470329344/

Specialist stitches:

  • Standing sc – to start a round, with slip knot on hook, insert hook into indicated stitch, yo and pull up a loop, yo and pull through two loops on hook
  • Standing hdc – to start a round, with slip knot on hook, wrap yarn around hook and hold in place with thumb or fi nger and insert hook in indicated stitch, yo and pull up a loop, carefully yo and draw through all three loops on hook
  • Standing dc – to start a round, with slip knot on hook, wrap yarn around hook and hold in place with thumb or finger and insert hook in indicated stitch, yo and pull up a loop, carefully yo and draw yarn through two loops on hook twice
  • fpsc/fptr – like normal sc,or tr, but instead of inserting hook at the top of indicated stitch, insert it from front to back around the post of stitch

My Version:

Ta dah!! This is my, as yet unblocked, version of this square using my colour palette (I blogged about this here). It’s annoying that my camera sometimes seems to insist that the purple yarn I’m using is blue!

I was super excited to see how this unique block would look in my colours and I really love how it’s turned out.  I did have to add a row of htr/hdc to mine as I crocheted quite tightly but it was a perfect 12 inches once I’d added those.

02+Logo

01+Text

Don’t forget to stay tuned for the next block to be released on 28th or 29th October.

KCACO-UK Afghan CAL 2015 -Block 20

Can you believe it’s time for block 20!!! It’s also kind of sad now we are almost coming to the end of the CAL but also exciting as we are not far from our complete blanket.  Now whether you are an Afghan square enthusiast or not you’ve got to love the designs of Julie Yeager.  Her Afghan squares in particular are always stunning and the ones I love the most are those that resemble a stained glass window.  As a big fan of hers I knew I wanted to add one of her designs in the CAL.   

This square will be available as a free Ravelry download throughout the end of the year 2015 (December 31, 2015).

Sun Catcher Afghan Square by Julie Yeager

Notes:

  • Hook: UK 5.5 mm / US Size I
  • Yarn: Aran / 10 ply / Worsted / Weight #4
  • Colours: Works best in at least 4-5 different colours
  • Pattern uses American crochet terms: see the following link for a printable conversion chart: https://www.pinterest.com/pin/70437470329344/ 
  • Specialist stitch: Front Post Single Crochet (FPSC) – see a good video tutorial here if you are not sure how to do this stitch; https://www.youtube.com/watch?v=UvdqqR2Kkho

My Version:

Ta dah!! This is my version of this square using my colour palette (I blogged about this here).  I love how it turned out! I love, love, love the stained glass window effect and how it highlights the pinks and purples in the centre!

03+Logo

01+Text

Don’t forget to stay tuned for the next block to be released on 14 or 15th October.

KCACO-UK CAL 2015 – Block 19

I just love the ingenuity of our next block and think you will too! Picots stitches are usually seen as a decorative edging on a crochet piece but our next designer has cleverly incorporated them into her design.  It’s a really interesting pattern to work up too as you are pretty much doing something different on each round.

Click on the link in the title below to go straight to the pattern or add it to your Ravelry queue here. This square is currently free on Ravelry and has been since May 2015.

If this is the first you are hearing about the CAL the full schedule can be found here.

Sorrel by Sadie Cummings

Notes:

  • Hook: 5 mm (US Size H)
  • Yarn: Aran / 10 ply / Worsted / Weight #4
  • Colours: I would suggest at least four or five different colours
  • Pattern uses American crochet terms see conversion chart here

Specialist Stitches:

Picot stitch: ch 3 or ch 4, slip stitch in either the 3rd or 4th ch (depending on which type of picot) – picot done.

My Version:

Ta dah!! This is my version of this square using my colour palette (I blogged about this here). This block is simply scrumptious with it’s perfectly positioned picots! I didn’t change colour every round and I also stopped at rnd 17 (which for me was htr/hdc) as I was spot on 12 inches.  

02+Logo

01+Logo

Don’t forget to stay tuned for the next block to be released on the 30th September or 1st October.

KCACO-UK CAL 2015 – Block 18

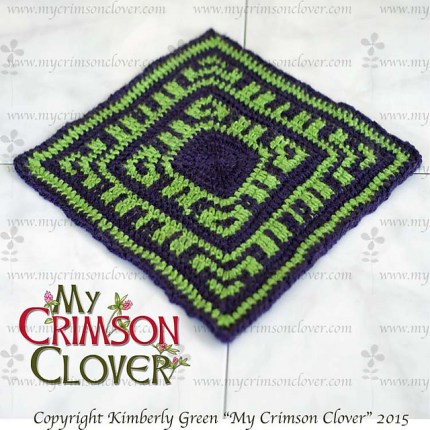
I have to confess that I am intrigued by tapestry crochet; just because you can be so creative with a design so I was very excited when our next lovely designer, from Crimson Clover, designed a tapestry crochet block for us to use in the CAL and what a unique design it is!

Click on the link in the title below to go straight to the pattern or add it to your Ravelry queue here. This square is currently free on Ravelry and will be forever yay!

If this is the first you are hearing about the CAL the full schedule can be found here.

Aztec Square by Kim Green

Notes:

  • Hook: 5.5 mm (US Size I)
  • Yarn: Aran / 10 ply / Worsted / Weight #4
  • Colours: I would suggest at least two different colours
  • Pattern uses American crochet terms see conversion chart here

Specialist Stitches:

None but you might want to research colour changing if you are not familiar with the technique:  Crochet Guru has a good video on Youtube.

My Version:

Ta dah!! This is my version of this square using my colour palette (I blogged about this here). I love how this design looks in two colours but I really wanted to use all five of my colours – as I have in all of the patterns we’ve made so far. I had fun coming up with this finished version.

01+Logo

02+Logo

Don’t forget to stay tuned for the next block to be released on the 16th or 17th September.